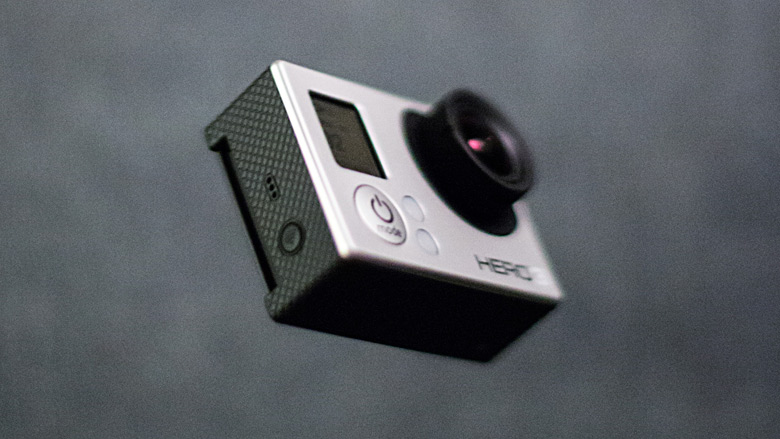
Stemming from the amount of interest on my first post – Understanding your New GoPro – I decided to dive a little deeper into some of the other aspects of the GoPro HERO3 Black Edition. There’s a lot of little things that are a bit harder to really know what’s going on inside that little box of ours.
I’ll dive right in.
Battery Life
As you’ve probably noticed – this is one of the weakest areas of the HERO3. It’s due to the intense processing power required to run all those high resolutions and frame rates while the battery capacity actually decreased from the HERO2. The camera is tiny so there’s minimal room for more battery power. Also now we’ve got WiFi built in whereas the HERO2 WiFi bacpac had its own battery source. I’ll share some of my battery life experiences with different modes & explain what we can do to help maximize GoPro life! Apart from the HERO2, this time around the engineers added in a really cool feature that is the Stand-by mode!
Stand-by Mode
Battery Life in Stand-by Mode = 6 Hours
Stand-by mode kicks in after the camera has been idle in any state (except recording) after 5 minutes. Once it’s in stand-by mode you won’t see anything different on the screen; however, if you press a button to record you’ll notice there’s about a 1 second delay between pressing the button and the camera responding (careful if you’re in photo mode and you’re waiting more than 5 minutes to capture a moment!). If you’ve ever wondered why there’s been a delay – that’s why! Stand-by mode is amazing for when the camera is accidentally turned on in your pocket or you forget to turn it off on your head when you’re not filming. I did some recording tests and my camera ran on stand-by mode (waiting to film) for 6 hours before dying. Most of the time I won’t worry too much about shutting my camera off to save battery because I know the camera will go saving itself in stand-by. Careful though, those 5 minute periods of running full power will add up – maybe in the future they could add a stand-by mode time setting where you could select 1 min, 2 min, 5 min, never, etc. Also, an important note – if you’ve got wifi on, stand-by mode will not initiate – the camera requires a certain amount of amps to keep the wifi going.
Wifi
Battery Life w/ WiFi On (APP) = 15-20% Reduction in Battery Life
Battery Life w/ WiFi On (Remote Connected) = 10% Reduction in Battery Life
Let’s start with wifi ON for the app. This is where the camera is essentially creating its own wireless network and broadcasting it out just like your home wireless router for internet. In my tests in various modes I was seeing a 15-20% loss in battery life while recording and simultaneously broadcasting the app wifi (compared against the same recording mode with wifi OFF). The difference was negligible whether the phone was actually connected to the camera or not – the camera is still having to broadcast the wifi network. I tested it while also simultaneously streaming a live-preview the whole time and surprisingly the battery was still seeing only a 10% loss in overall battery life compared to the control (without wifi). It gets tricky though because the live-preview shut off after the battery had been about 60% depleted. Not sure where that is programmed in or perhaps it was a bug. I do recall hearing something about the LCD bacpac shutting off when the battery gets low (25% or lower); so perhaps wifi streaming has something similar.
Next is the Remote. To my understanding the wifi protocols are slightly different here vs the App setting. I was seeing only a 10% reduction in battery life while the remote wifi setting was on and connected the whole time. The camera was set to record the whole time as well.
Should you Turn Off Wifi?
With all that being said – should you worry about the little blue light blinking when you aren’t using the WiFi? If you’re filming at 1080-30 without ProTune you’ll probably get around 95 minutes of record-time – with that blue light blinking, indicating wifi is on, you should expect around 75-80 minutes of record time. If you’re not recording for tons of time I wouldn’t worry about it, but if you’re trying to maximize time let’s make sure the wifi is turned off. This is easily accomplished by holding down the wifi button on the side until the blue light blinks 7 times.
Other Settings
As you can see in the list of battery life, frame rate has a large effect on battery life. I haven’t done a comprehensive test but you’ll definitely get longer life out of lower frame-rates. This may be counteracted by higher resolutions as well. I also tried a few tests with all the blinking lights off. For lights off the battery life change was negligible. I heard it would improve by about 5% but my tests showed nothing
Photo Settings
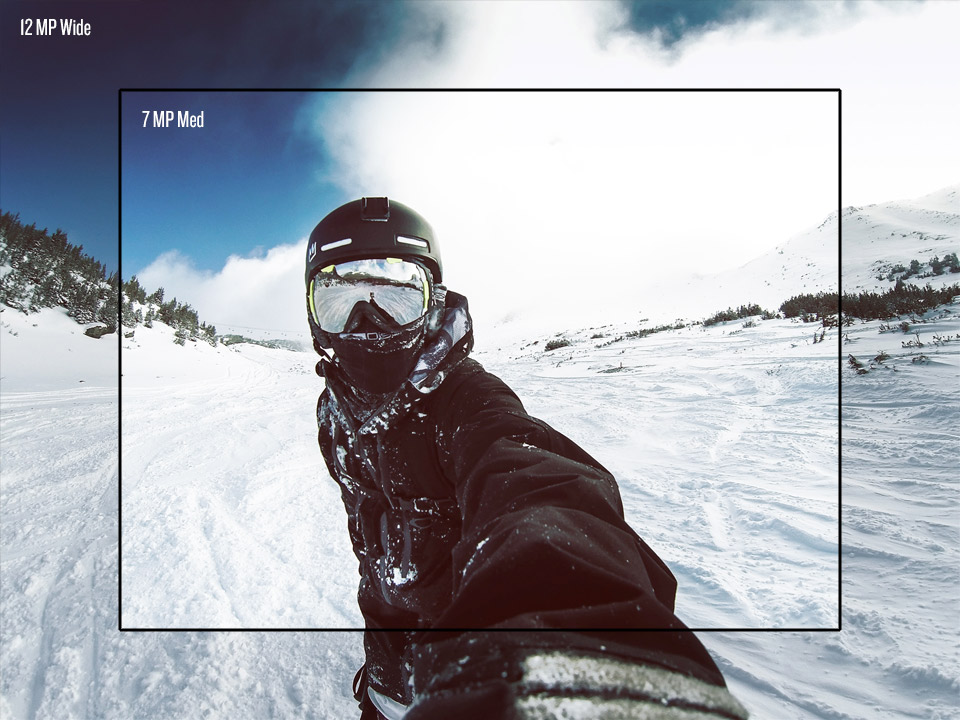
For best results always keep it on 12MP Wide
I forgot to mention photo settings in my previous post. It’s pretty simple. The 12 MP Wide setting is using nearly the full sensor & it doesn’t scale so you’re getting a full 4000 x 3000 px photo out. Remember the explanation about cropping the sensor for medium & narrow FOVs in video mode? Photo mode has the same deal for the 7MP & 5MP Medium modes; however it’s slightly different from video. In video the final output was tiny compared to the full sensor (1080P vs 4K) so you could choose medium mode and you were actually gaining something by shooting in this mode – a new FOV at the same high 1080P resolution. In photo our final output is the full 4000 x 3000 px so when you’re doing a medium mode it’s just cropping the edges off of that 12MP photo and calling it a 7MP medium FOV photo! What this means is you can shoot in 12 MP Wide and crop that photo to look identical to the 7MP medium mode (IE no reason to switch out of 12MP wide ever!). Furthermore, 7MP wide is simply the 12MP photo scaled down, which we don’t like. 5MP medium is just 7MP medium scaled down.
When you do want to think about using these additional modes is when you’re looking to get more photos on your SD card – photos take up space, so the lower sized modes will take up less of it!
Video & Photo Simultaneously
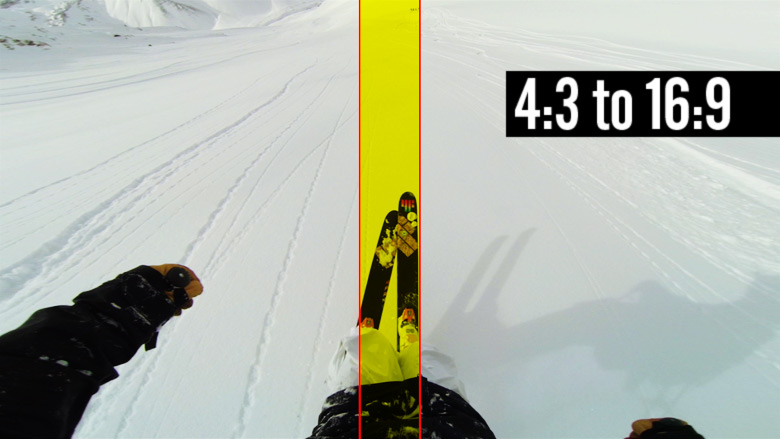
There are two ways to capture photos at the same time as video – Simultaneous Video & Photo mode in the menu as well as a Power/Mode button press during recording. The size and quality of the photos are slightly unique in the photo/video at the same time modes. The aspect ratio of the photo will end up matching whatever film mode you’re in – so if you’re taking 1080P video, the photo dimensions will be the same as 4K video (8MP) and 16 x 9. This is the same thing that Canon cameras do when you’re recording video and snap a photo during the process. The quality will look more like a high res screen grab than a photo. The processing & settings for regular photo modes are different than video; however, these photos will have the ‘video’ processing attributes. They may look a bit softer and have more grain & compression artifacts than a standard photo.
Simultaneous Video & Photo
This basically will save a photo every 5, 10, 30, or 60 seconds during video recording. You’re pretty limited to which modes will work for this one: Non Protune, 1080P up to 30FPS, 720P up to 60FPS, and 1440P up to 24FPS.
Power/Mode Button Press during Recording
I just found out about this setting – if you’re in one of the simultaneous ‘approved’ modes, if you press the power/mode button it’ll save a 4K photo at that moment.
Taking Vertical Photos
I’m a huge proponent of taking vertical photos with the GoPro. This is more of something you just consciously have to think about when taking photos out in the wild. Turn the camera sideways (go ahead, I dare you!) and snap some shots of yourself or your friends. The results are rad and you’ll catch more of the action. Rotate it in post on the computer. * Tip * Aim the center of the camera at your waist if you’re doing selfies – the wide angle lens will capture your feet and head with plenty of space. Here are some examples of mine!
Loop Recording
Loop recording is a new feature and is kind of mysterious at a first glance. Applications? You could use this as a car dash cam like all the people in Russia seem to have. Get a car USB adapter and keep the camera plugged in at all times. If you set it for, say, 20 minutes you’ll always be able to stop the camera and have at least the previous 20 minutes recorded. This way if on hour 16 of your road trip you see a meteor exploding, you can stop the camera and have 20 minutes leading up to the meteor explosion. Pretty cool. The way it works is by actually splitting the 20 minute duration by 4, and keeps 5 sets of these clips on the SD card at any given time. 4 of the 5 clips are 5 minutes in length (20/4) which equals the full 20 minutes, the 5th is the current one recording (until it hits 5 minutes). So if you stop after 44 minutes you’ll have 4 clips each 5 minutes long and one clip 4 minutes long. This is why I say you’ll always have at least 20 minutes (or whatever duration you set).
PAL vs NTSC
PAL & NTSC Video Looks the Same (except for frame rate)
I’ve been getting a lot of questions about the differences between PAL & NTSC. In general you can assume PAL will look identical to NTSC (other than framerate of course). As far as I know you can read what I have to say about mode qualities and apply that to the coinciding PAL framerates. For example, I suggest 1080-60 as a great go-to mode for most of your filming – the same is true for 1080-50 in PAL because it has the same video qualities and processing. Apply the same approach for 720-120 in NTSC and 720-100 in PAL. They both will have the same type of processing that gives aliasing in the wide mode and no aliasing in the narrow mode.
PAL vs NTSC differences & purpose goes back to power type and frequency. We use 60 HZ power in America while Europe has stuff cycling at 50 HZ. We had an issue last year at Winter X Games in Tignes France. We had decided to film everything in NTSC to be able to have optimal framerates for TV commercials back in the US afterwards; however, when we were filming at night for the half pipe all of our NTSC footage was flickering like crazy – this is because the lights in Europe are running at 50 HZ. Be careful when you’re filming dark scenes but it’s generally a good practice to film in your countries’ native power cycle-age – PAL in most european countries and NTSC in the Americas and parts of Japan.
Camera Issues?
If you’re experiencing a glitchy camera the first step is to head over to the GoPro website and make sure your camera has the latest firmware installed (this is like the latest version of the software in the camera).
http://gopro.com/support/product-updates-support
If problems keep occurring the next step is to make sure you’ve got a fast enough SD card – see the suggested list of cards for GoPro:
http://gopro.com/support/articles/software-update-release
If that doesn’t solve your quandaries contact GoPro customer support; they will help without hesitation.
A common question I get is regarding skipping video on playback. When that occurs first make sure your footage is copied off of the SD card and you’re running it from the computer’s HD or an external. Next, try using VLC. It’s a free player that usually gives the smoothest playback with GoPro files.
Questions? If you’ve got em, shoot them below! If you have ideas for a Part 3, let me know!

