HERO4 Series
New Features of the HERO4
Understanding Video in the HERO4
Understanding Photos in the HERO4
The HERO4 brings a whole new set of customized settings for photos, as well as new controls for long exposure photos and time lapses. If you want to learn what each of the new settings do and when to use them, you’ll be able to dial in better looking photos right away. All of the following modes & information are available on both the HERO4 Black & Silver.
Resolution & FOV
The HERO4 is capable of shooting up to 12MP photos in a wide FOV (same as HERO3+). There are a few options such as 7MP Medium, and 5MP Wide & Medium; however, they are all derivatives of the full 12MP Wide photo. With that in mind, it makes sense to always keep it in 12MP Wide, since you’re not gaining anything using the alternatives. The only time you may want to utilize the lower resolutions is if you’re concerned with SD card capacity, or you don’t know how to crop photos in post (for the medium FOV).
ProTune for Photos in the HERO4
We’ve had ProTune available for video for a few years, and GoPro has brought the same flexibility to photo modes. When you enable ProTune in the photo settings it’ll open up some of the customizable settings you’re used to seeing in DSLR cameras. You can control white balance, color profile, ISO limit, sharpening, and exposure compensation.
White Balance
White balance basically determines the color temperature of your photos (cool to warm). By default this is set to Auto which generally does a good job in all conditions. To lock off the color temperature, you can set this to the different Kelvin values between 3000K & 6500K. 3000K will cast your footage blue relative to neutral, while 6500K is quite warm/yellow compared to neutral. Lastly is a setting called ‘Native’ which won’t apply any WB correction matrix. If you’re going to change this setting, using the app or a screen helps quite a bit.
Color Profile
This controls the overall color/contrast look of your photos. It has two options: Flat & GoPro Color. The ‘Flat’ profile produces an image with less contrast and saturation and is intended to be used with color correction tools. ‘GoPro Color’ is what you’re used to seeing out of a GoPro – it has standard color and contrast.
ISO Limit
This sets a cap on how high the auto ISO will go. ISO is basically how much digital lightness is added to the photo. You can set the limit from 800 (lighter with more grain) all the way down to 100 (darker with less grain). Most of the time this setting will only take effect in low light or at night; during the day the GoPro stays hovering around ISO 100.
Sharpness
Digital sharpening has always been added to photos to have the appearance of being sharper and more appealing straight out of the camera. Typically, if you manually add your sharpening later, you’ll have a higher quality image. Now you have the ability to set the level of added digital sharpening. I leave this at low as I think it produces cleaner looking photos.
Exposure Compensation
The last setting in ProTune is Exposure Compensation which lets you tell the camera to always be slightly lighter or darker than normal. By default it’s set to 0. If you set the exposure compensation to +2.0, the photos will be 4 times brighter than normal. Similarly if you set it to -2.0 they will be 4 times darker than normal. Careful when adjusting this – there’s no indication on the UI once it’s set – be sure to check this value regularly if you’re prone to changing it now and then. I keep this at 0 for most things. On occasion if it’s a varied scene with a mixture of bright highlights and dark shadows, dropping it to -0.5 can help save some highlights. If you’re having trouble getting short exposure durations (lots of blur in motion), experiment with dropping this lower so the camera isn’t trying to achieve such a high level of auto-exposure. This setting is deactivated for fixed exposure times in Night Photo/Lapse
Abe’s Go-To ProTune Settings for Daytime Activities:
White Balance: Auto
Color Profile: GoPro
ISO Limit: 800
Sharpening: Low
Exposure Compensation: 0 or -0.5
Abe’s Go-To ProTune Settings for Night Photos:
White Balance: 5500K
Color Profile: GoPro
ISO Limit: 200 or 400
Sharpening: Low
Exposure Compensation: 0
Long Exposure & Night Photo/Lapse
You now have the ability to shoot photos with exposures up to 30 seconds, opening up a whole new world of photo and time-lapse possibilities! This is something GoPro media member Kevin Custer and I personally worked hard to define and push into the HERO4 so I’m extremely happy it’s working well and getting great use.
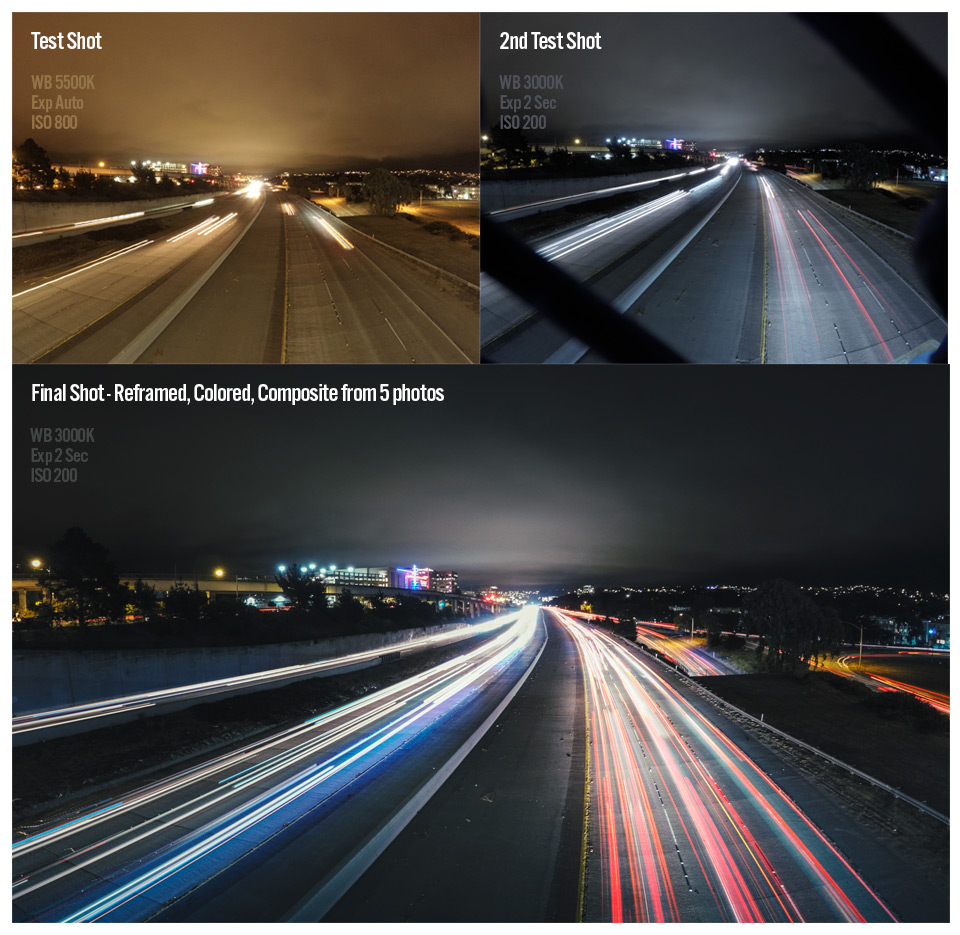
Left – Lapse from Auto Exposure, WB 5500K, ISO 200
Right – Lapse from 2 sec Exposure, WB 3000K, ISO 200
Normally when you’re shooting during the day, a photo exposure is between 1/8000th of a second and around 1/60th of a second (really fast). When you manually tell the camera to expose longer, it’s keeping the sensor “open” and receiving light for long periods of time. This means you can capture movement changing over time in a single photo. This is most usually seen at night with fast moving cars or people with flashlights creating words or shapes in the air; however, you can shoot long exposure photos during the day if you have the proper tools. You’ll need a neutral density (ND) filter. It’s basically sunglasses for lenses allowing the camera to expose for longer periods without receiving too much light. Examples of daytime long exposure shots are most often seen as waterfalls, creeks, or ocean waves that look smooth and airy.

Night Photo – Auto Exp, WB 5500K, ISO 400
There are two ways to capture long exposure photos in the HERO4: Night Photo and Night Lapse. Night photo is a sub-mode of the single photo bucket on the HERO4; night-lapse is a sub-mode of the multi-shot bucket. Keep in mind: the settings you’ve applied in single photo get applied to night photo, while the settings for multi-shot apply to night lapse. The two modes are very similar but have slightly different parameters.
Night Photo
The exposure time on Night Photo is set to auto by default. In auto, it’ll expose from 1/4096th of a second up to 2 seconds. This means you can use this mode for regular photos as well! For more customized photos, you can manually set the exposure to 2 sec, 5, 10, 20, & 30 sec. Coupled with the WiFi or App remote, this mode could be great for stop-motion long exposure video creation!
Night Lapse
Night Lapse mode allows you to set two things: exposure time and interval time (time between shots).
Exposure Time
Exposure time is set to auto by default, with exposures ranging from 1/4096th sec to 2 sec. One thing to note is auto will expose properly during the day as well, so this mode can be used to create lapses that go from day to night or vice versa. You can set exposures manually at 2 sec, 5, 10, 20, and 30 sec.
Interval Time
Interval time is set to continuous by default – this means the next photo will start exposing directly after the previous photo finishes exposing. There is a small delay between shots for processing. For example, if you set the exposure time to 20 seconds, each photo will be about 21 seconds apart. Having a continuous interval allows you to capture almost all of the light being emitted in any single duration. You can also manually set the duration between photos to 4 sec, 5, 10, 30, 60 sec, 30 min, 60 min. Interval times are independent of exposure times, meaning the exposure starts on the beginning of the interval, and must finish within that interval. You’re forced to choose an exposure time that is less than the interval time. 30 and 60 minutes can be used for filming long duration things like plants growing, buildings being constructed, or snow melting. Use these modes with the camera in a very static place plugged in via USB. You’ll want to use auto exposure since photos will be happening both during the day and at night.

Utilizing ProTune Settings for Night Capture
Both single night photo and night lapse are strongly affected by ProTune settings, if enabled. The 2 main settings you’ll want to play with are White Balance, and ISO Limit. I strongly recommend dialing in your settings while utilizing a screen, either on the camera, or with the GoPro App. Take a few test photos while changing settings around.
White balance is an important setting to play with since in most situations you can’t really see what color temperature the ambient light is. For the most part, 5500K is a neutral color that will give you a consistent color over your photos; however I recommend tinkering with it within each scene if you have the time. With ISO, if you have a low limit set during low light capture (with auto exposure set), the camera will still do what it can to auto expose to the proper lightness; it’ll look to exposure time to make up for the lack of light, elongating the shutter time (giving more blurry photos if in motion). During full night star capture is when this setting really comes into play – see what grain level is acceptable for the light trade off, and experiment with a few different ISO settings.
Testing WB, ISO, & Exposure timing is key for night photo/lapse – Here you can see the progression
Recommended Exposure Uses
- Auto (1/4096th Sec – 2 Sec)
This has a wide variety of uses, from normal daytime photos all the way up to decent night city photos. Best uses are Day to night transition lapses, camp fires, city lights, city-freeway driving, fireworks, & light painting. You can also try utilizing this during high motion activities during the day with or without an ND filter. It will help to have something static in the frame relative to the camera so the background blurs by, such as car/motorcycle mounted. - 2 Seconds
This is great for city lights, freeway driving, fireworks, light painting, thunderstorms. - 5 Seconds
5 seconds will work for most things that 2 seconds does well; however, you can utilize a lower ISO setting to get cleaner and darker footage. This is great for darker city shots, more rural roads, fireworks, light painting, thunderstorms, camping. - 10 Seconds
10 seconds is the first threshold that becomes better in darker situations. City lights will be on the verge of too bright. This is great for full moon night shots, brighter stars, camping. - 15 Seconds
Similar to 10 seconds, this is for a dark cityscape, or a light landscape (full moon). Utilize what worked well in 10 seconds but with lower ISO. - 20 Seconds
20 seconds is where we’ll be picking up decent stars. This is great for dark landscapes, star lapses, night ocean tides, etc. Experiment with different ISO to get the best trade off of light and grain. - 30 Seconds
If you’re in a dark area and want to capture stars, 30 seconds is the way to go. This is also great for dark light painting where you want to have the most amount of time to draw your shapes.
Single Shot, Continuous, Burst, Time Lapse
Taking photos during the day is pretty straight forward with a GoPro. There’s a couple ways to go about taking photos and there are a few nuances between modes that could be helpful to know when shooting. Also, the HERO4 has a subtle increase in processing speeds of single photos, continuous, and burst photos.
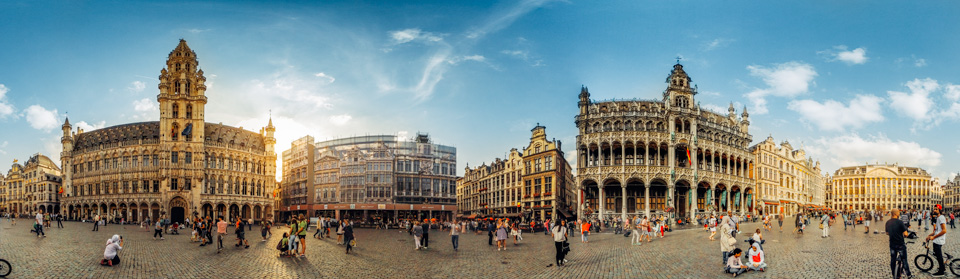
Panorama taken with Continuous Photo while turning around slowly – Stitched together with Bridge & Photoshop
Single Shot
This mode is your basic camera: one press of the shutter will snap one photo. The camera is able to expose for up to 1/2 second in this mode. Generally single shot and continuous will produce photos that are a slightly higher quality when compared against burst, or time lapse photos. After you hit the shutter button, the first beep indicates the photo being taken, while the second beep indicates it’s done processing and has saved to the SD card. When comparing the processing/save time to HERO3+, the HERO4 does it in about 1/2 sec, whereas the HERO3+ takes around 1 second.
Continuous
Continuous is a sub-mode of the single shot bucket so ProTune & photo settings for single shot will apply. In continuous, if you hold down the shutter, it will take photos until you release (or reach the 30 photo limit). If you use continuous with the WiFi remote or app, it acts more like time lapse where you press record to start capturing at the rate you’ve set. It’ll go until you either hit stop or reach the 30 photo limit. For example, if you set it to continuous with 3 FPS, it’ll run for 10 seconds capturing 3 photos per second, when initiated with the app.
Burst
This mode allows for ultra high frame-rate capture – up to 30 photos in 1 second. Previously, with HERO3+ once a burst was finished capturing, it took around 8-9 seconds to process and save to the SD card. During this time the camera is inactive and busy processing. With the HERO4, the time is reduced to between 5-6 seconds for 30/1, and 3-4 seconds for 30/3! This is huge for using burst multiple times consecutively and quickly during activities like skiing. Also, previously when the record button was pressed it took around 1 second before it would start bursting – with HEOR4 it is almost instant.

30 Photos in 3 Seconds – Fired with WiFi remote in Hand.
I most often use burst in combination with the WiFi remote, with the duration/rate set to 30 photos in 3 seconds. This allows me to do a fast action activity and capture the perfect moment. If access to the remote or shutter button is more difficult, I look to time lapse to capture photos during my activities.
Time Lapse
Time Lapse mode has two main functions – capturing photos during activities, and creating time lapses.
Capturing Photos with Time Lapse
For most users, time lapse mode is the go-to method of capturing photos. When you press the shutter button it will start capturing photos at the rate you specify until you hit the shutter button to stop it. For general every-day photos & selfies, I recommend using 0.5 photos/sec (2 photos per second), taking around 5 sec worth of photos. This way you’re able to start the recording, get the camera steady and hold a pose for a few seconds. You’re likely to get a few options in the middle that are crisp.
If you’re doing any sort of activity where you’re trying to pick up fast action or where things are changing quickly, using the quickest rate is best at 0.5 photos/sec. When it’s less important to capture a specific moment in time but you still want a few photos of your activity, bumping it up to photos every 2 sec or 5 sec can be used. This way you can later choose specific photos from general ‘sections’ of your activity without having to sift through thousands of photos.
.5 Second Interval
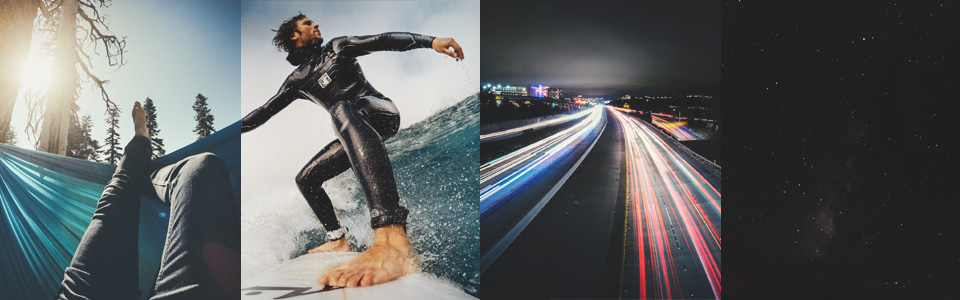
Uses: Either fast action activities where you’d like to capture a very small specific moment in time, or basic handheld photos for the every-day. Fast action examples are surfing, advanced skiing (freestyle & park), downhill mountain biking.
2, 5 Second Interval
Uses: Slower going activities without specific moments you’re trying to capture. Scenic drive (auto or moto), slow paddle board, hiking, horseback riding, trail biking.
One last factor to consider is exposure time: 0.5 sec & 1 sec intervals allow for exposures up to 1/5 of a second. When you jump to 2 sec intervals and above, it will allow for exposures up to 1/2 sec. If you’re doing an activity where you’d like to capture motion blur, 2 sec mode will help significantly, but not to the extreme of using night lapse.
Once you know what sort of duration to use, experiment with the ProTune settings to dial in your photos. If you’d like to push the exposure time longer for increased motion blur, lowering the ISO limit may help. Reversely, if you’re noticing significant motion blur where you’d rather have cleaner/crisper shots, try lowering the exposure compensation. By lowering the overall AE target, the camera will be exposing for less time to reach a darker (but less blurry) image.
Capturing Time Lapses with Time Lapse
The GoPro is a very powerful tool for capturing stunning lapses! Setting up the proper interval time is as easy as knowing a rough estimate of how long you’re going to capture the lapse for. Once you’ve captured photos, GoPro Studio makes it incredibly easy to stitch together as a video. You simply drag and drop either the whole folder, or one single photo, and it’ll auto-recognize the rest of the photos that belong with it and build the lapse. Also, you can easily speed up a time lapse in editing so I have a tendency to shoot shorter intervals, giving me padding to speed up or slow down in post if I need.
0.5 Sec Interval: 30 Min – 1 Hr Record Duration
1 Sec Interval: 30 Min – 1 Hr Record Duration
2 Sec Interval: 1 Hr – 2 Hr Record Duration
5 Sec Interval: 2 Hr – 4 Hr Record Duration
10 Sec Interval: > 4 Hr Record Duration
For the most part, tinkering with ProTune settings for photos beyond getting your desired photo look (color, sharpness) isn’t necessary. Auto white balance usually does a great job all around for most photos. If you’re doing a time lapse that could benefit from the white balance not changing over time, feel free to lock it off at a certain color temp.
Check out GoPro photos I’ve taken: GoPro Photo Stream