HERO5 Series
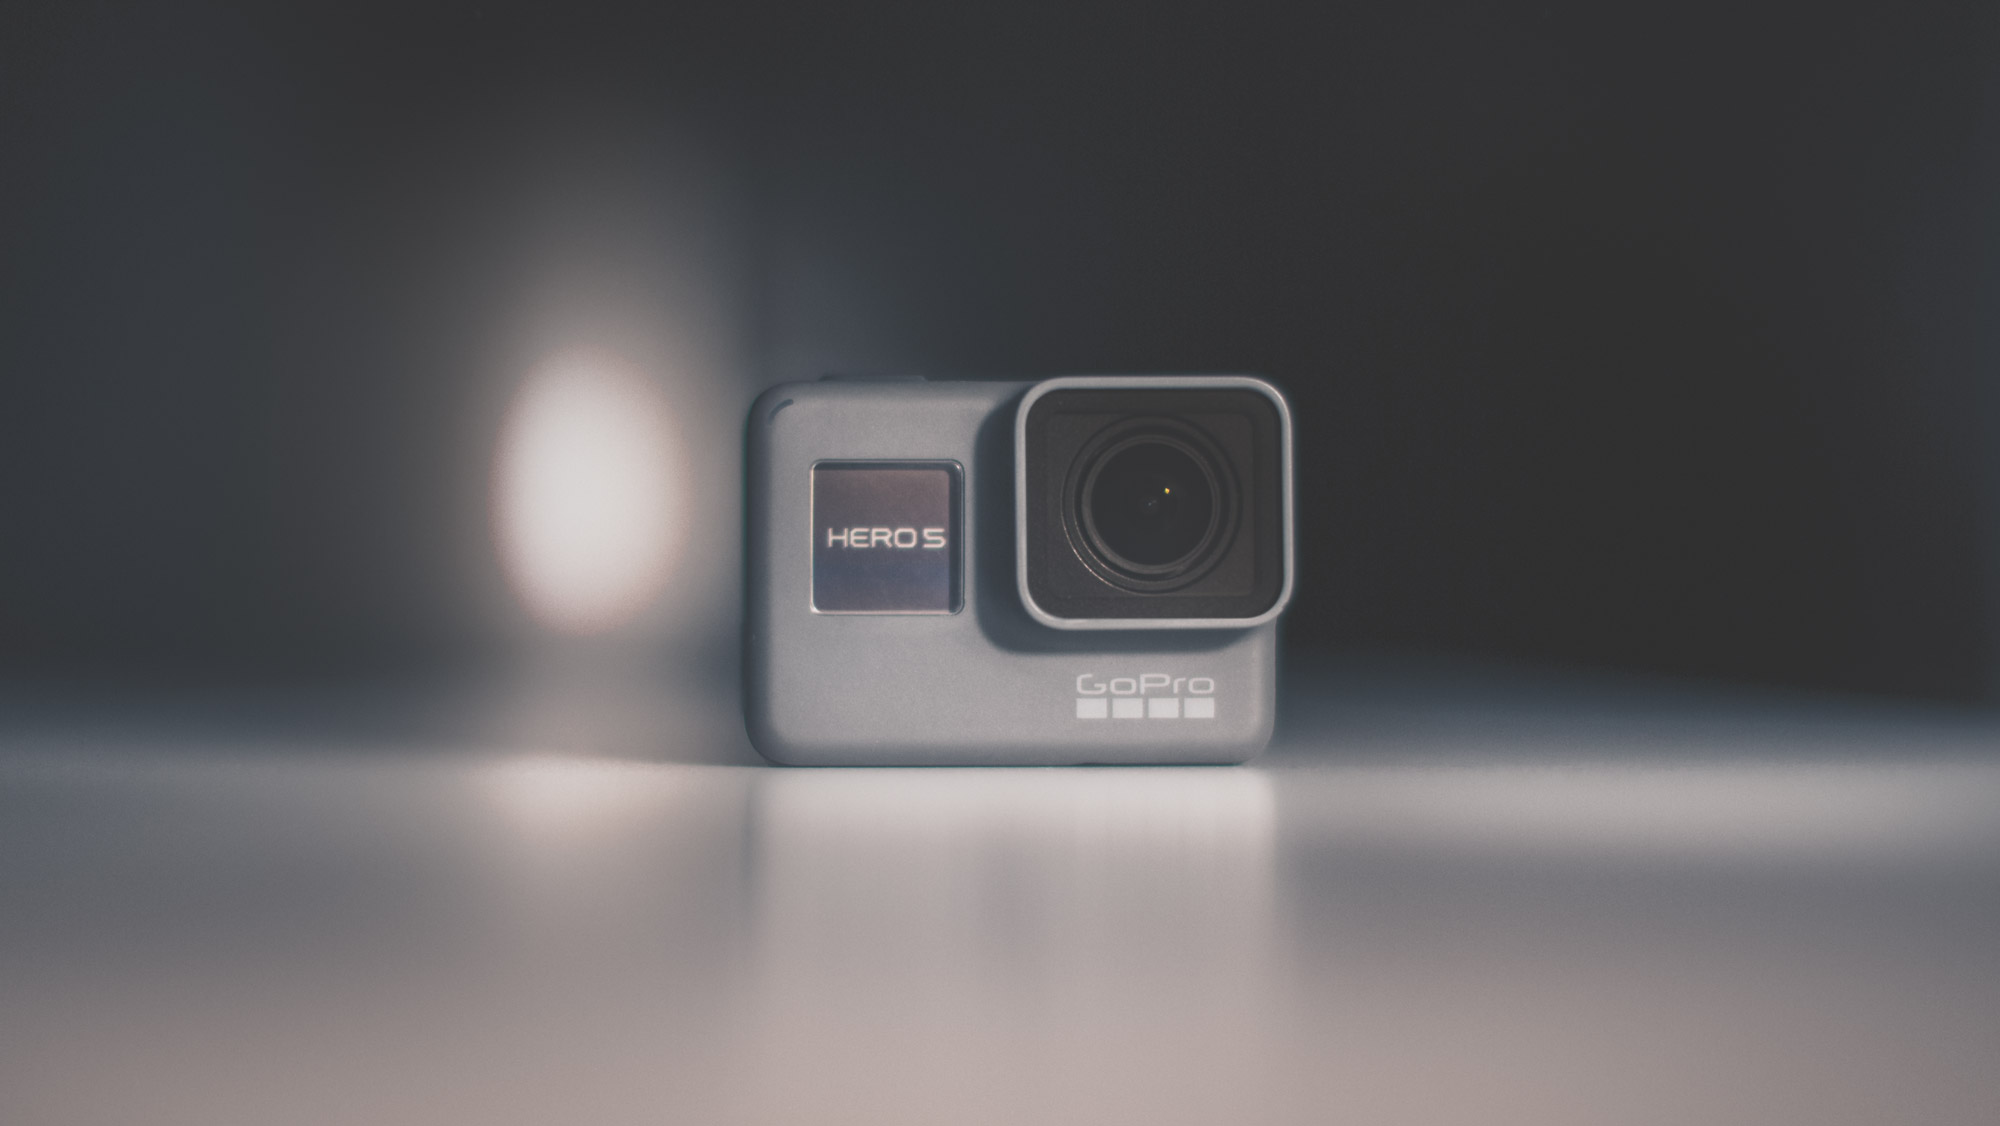
GoPro HERO5 Black
Video Settings in the HERO5 Black
Video Modes in the HERO5 Black
The following list is my personal review of each major mode that appears in the HERO5 Black – I mainly focus on image quality and utilize this information to maximize the overall visual quality of my videos. If you’re up for it, learning when and how to use each mode will guarantee a higher quality final output.
Explanation of Terms
POV: Cameras mounted to your head, chest, or other point of view of action.
Mounted: Similar to POV but usually refers to cameras mounted to physical objects (cars, skis, bikes, etc).
B-Roll: Any other camera mount (handheld, pole follow-cam, glide-cam, interview cameras)
Abe’s Go-To Modes for Maximum Image Quality:
Non-POV without Slow Motion: 4K-30, 2.7K – 30 Linear
Non-POV with Slow Motion: 2.7K – 60 Wide, Medium, Linear, 1080-120 Narrow
POV without Slow Motion: 2.7K 4:3 – 30 or 2.7K Superview 30
POV with Slow Motion: 1440-60 or 1080 Superview 60, 960-120 or 720 Superview 120
Abe’s Go-To ProTune Settings for Maximum Image Quality:
Color Profile: GoPro
White Balance: Auto
ISO Limit: 400
Shutter: Auto
EV Compensation: 0
Sharpening: Low
-
4K – 24 & 30 – Wide
This is my favorite mode when I don’t need slow motion. In editing, even when scaled to 1080P, you instantly know when you’re looking at a 4K shot vs a 2.7K shot. The level of detail and clarity is stunning, especially with good outdoor light. At 60 MBit/s 4K is pretty much max-ing out the data flow, so when you film extremely high motion scenes you’ll start to see a bit of compression blocking. That being said, it still holds up well and looks great for most applications.
Uses:
Anything you don’t need slow motion! Karma, B-Roll, interviews, etc. 16:9 frame has a less immersive feel for POV so a 4:3 mode is generally better for fast action POV. Use 24 FPS for slightly better low light performance. -
4K SuperView – 24
This takes advantage of the full frame of the sensor, pulling the images from the taller 4:3 aspect ratio and dynamically stretching them down to 16:9 4K. This gives you more view above and below what would be your normal 16:9 frame. It looks great but should generally only be used for POV/mounted shots; otherwise, the dynamic stretch may give undesirable distortion over your footage.
Uses:
This is good for action sports films that want to take advantage of 4K and good immersive POV; keep in mind it maxes out at 24FPS. -
2.7K – 60 – Wide, Medium, Linear
This is my ‘everything’ standard for filming non-POV footage. Medium will naturally have a bit more grain in lower light as you’re cropping in on the sensor and are closer to actual pixel size without scaling. Use Linear if you prefer to not have the fisheye distortion look.
Uses:
Mounted non-POV, auto, B-Roll, Karma, pole-cam, diving, etc. 60 FPS will help with reducing rolling shutter on mounts with high vibration, compared to 30 FPS. -
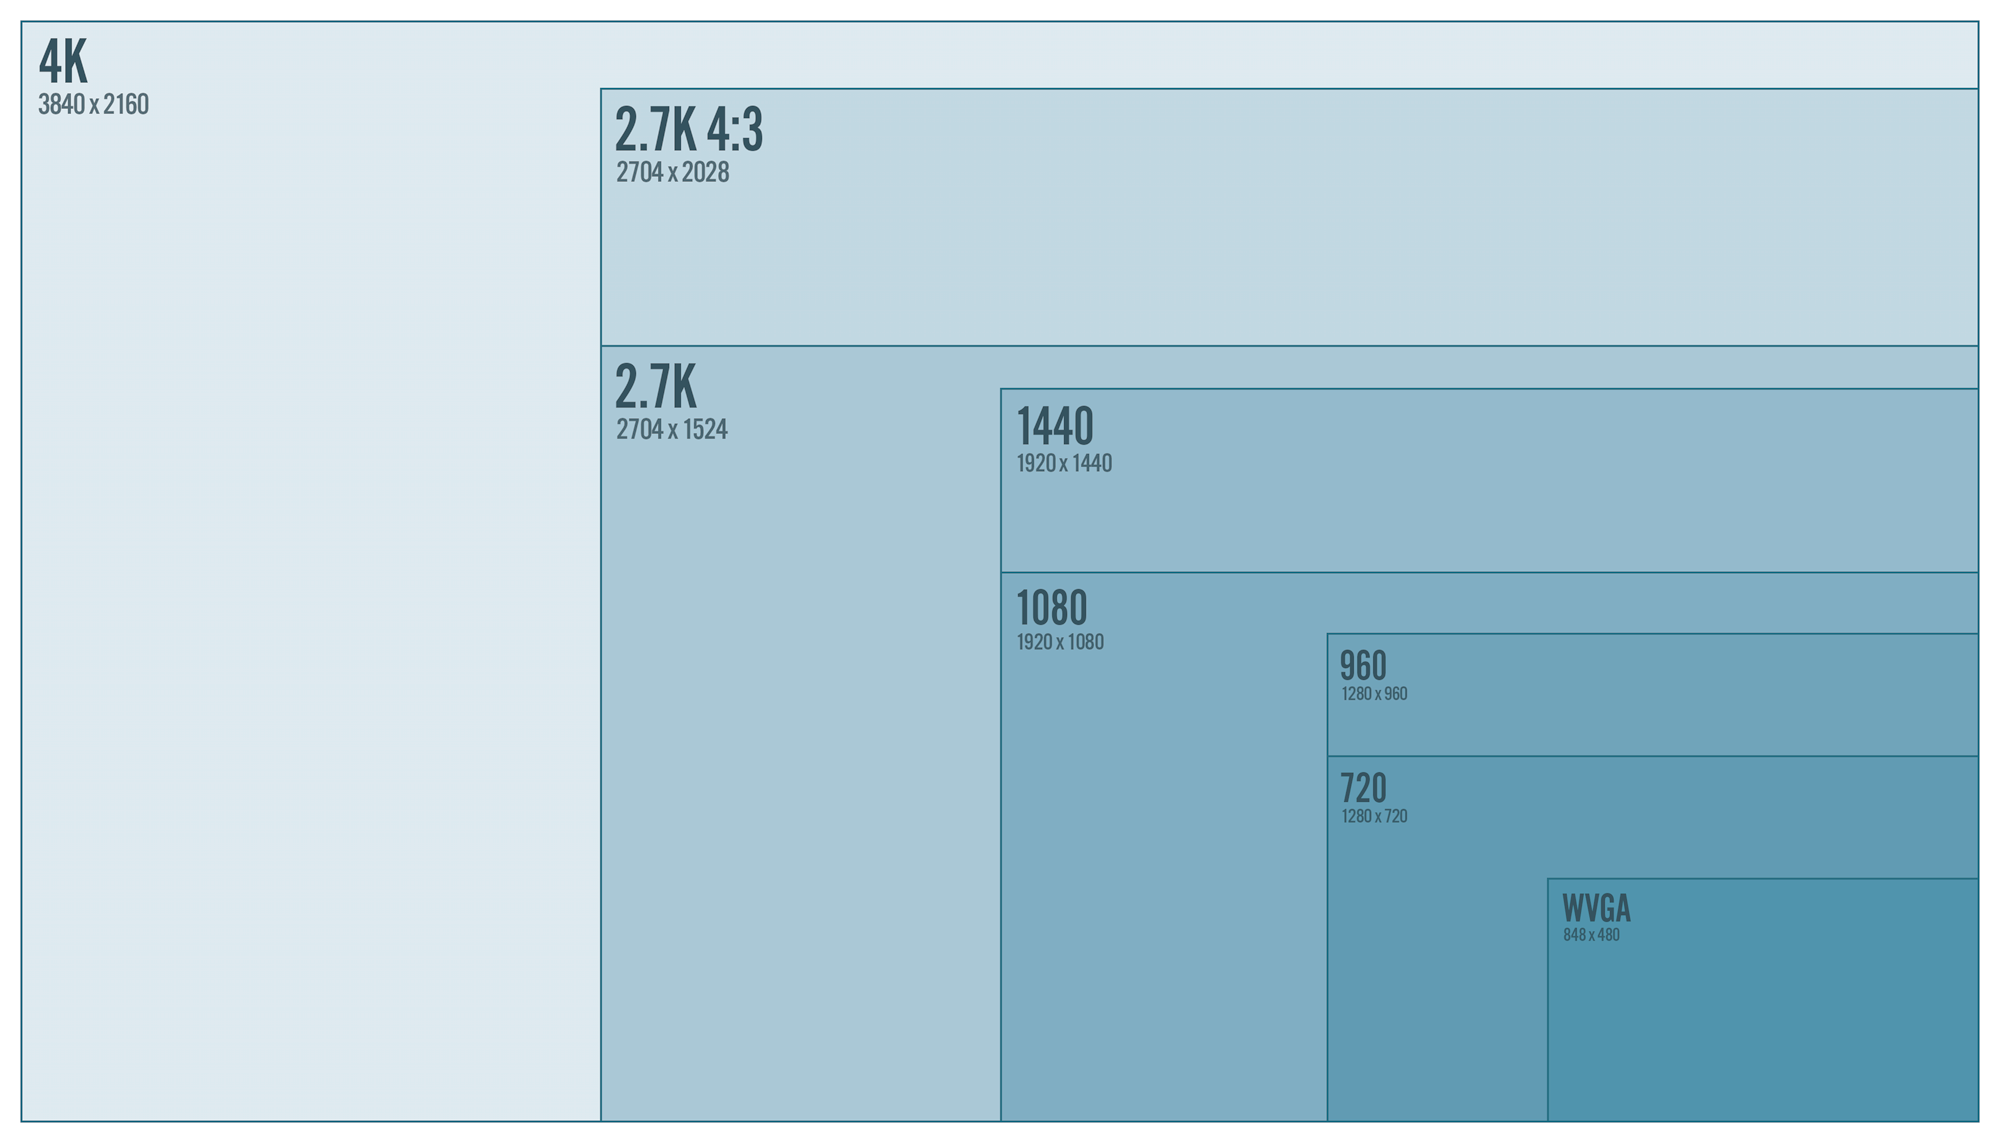
2.7K 4:3 – 30 / 2.7K Superview – 30
Similar to 1440P, this mode takes advantage of the full 4:3 aspect ratio of the sensor. It has the same width dimensions as 2.7K but is taller with a height of 2028 px (vs 1524 px of 2.7K). I use this anytime I want to capture the most real, immersive, and real-time POV (no slow motion). I utilize dynamic stretch techniques to pop it into a 16:9 frame when editing. If you want the immersive 4:3 view but want it in a 16:9 frame right out of the gate, use 2.7K Superview (Superview is now found in the FOV settings for the HERO5 Black, under normal 2.7K, and is only available in frame rates 30 and under – when dealing with 2.7K resolution.) This mode takes the tall 4:3 frame captured in 2.7K 4:3 and dynamically stretches it down to a 2.7K 16:9 frame. If you want quick and immersive POV footage without dynamically stretching the footage yourself, this is a great mode to use.
Uses:
Anything POV that doesn’t need slow motion. This is great for wearing on your chest or head to capture daily life, behind the scenes work, car driving, etc. Works well indoors & outdoors. -
1440 – 60 / 1080 Superview – 60
This is the 4:3 version of 1080, so it’s the same width as 1080P but taller at 1440 px vertically. When looking at 100% you’ll see very slight jagged edges/aliasing compared against 1440-30. This is due to it being processed slightly differently to get the combination of high resolution and high frame rate. This is my go-to mode for all around great high action POV. I utilize the dynamic stretch techniques to properly put this into a 16×9 timeline. If you want the immersive 4:3 view but want it in a 16:9 frame right out of the gate, use 1080 Superview.
Uses:
Anything POV that you may want to slow down in editing. -
1440 – 80 / 1080 Superview – 80
When you make the jump from 1440-60 to 80, there’s a slight change in quality. You’ll see a bit more aliasing on hard edges in 1440-80 when comparing to 1440-60. It’s the same quality you’ll see in 1080-120 Wide, so these two modes mix and match well. In editing you can slow this down to 37.5% of original speed and still retain 30 FPS. If you want the immersive 4:3 view but want it in a 16:9 frame right out of the gate, use 1080 Superview.
Uses:
High action POV that you want to capture better slow motion. Generally you’ll want to stick to outdoors; avoid using this in lowlight or dark indoor areas. -
1080 – 120 – Wide
When looking closely against 4K or 1080-60, you may notice aliased edges similar to that of 1440-80. It looks great on the web.
Uses:
Any high action moments you want to slow down a lot that require the full wide angle of the GoPro. If image quality is your highest priority, look to 2.7K-60. You’ll want to stick to good light outdoors with this modes. -
1080 – 120 – Narrow
This mode looks like a standard non-fisheye camera with a 50mm lens. It does this by cropping into the middle of the sensor. This mode will appear noisier compared against 1080-60 wide when looking at 100% since it’s cropping narrowly into the center of the sensor, and it’s not getting a ton of light while capturing at 120 FPS.
Uses:
Try this on Karma or a pole cam for interesting slow motion shots. It will add something extra and different to your videos! Remember to have plenty of light since the frame rate is so high. -
960 – 120 / 720 Superview – 120
This is still the go-to mode if you want the best slow motion for your high action POV moments. This is also one of the best modes to use for Instagram video – the 4:3 aspect ratio is closer to a square and it has great slow motion. For normal 16:9 video sharing, if you utilize the dynamic stretch tricks in post, the quality generally holds up well against higher resolutions. If you want the immersive 4:3 view but want it in a 16:9 frame right out of the gate, use 720 Superview.
Uses:
Highest/fast action POV that you want to slow down. Surf barrels, skate trick POV, cliff diving, etc.
ProTune for Video in the HERO5
ProTune is a setting in the HERO5 that, if enabled, will force high bit-rate for all video modes (up to 60 Mbit/s) as well as activates a few adjustable video settings – White Balance, Color Tuning, ISO, Manual Shutter, Exposure Compensation, and Sharpening. At the most basic level, if you enable ProTune and don’t touch the settings, your video footage will look exactly the same as it did without ProTune, but higher quality (higher bit-rate). We can dive a bit deeper and learn about the effects of the different settings, and how they can be used to increase the quality of your footage.
Color Tuning
Color tuning is the overall color, contrast, and saturation settings of your video. There are two options – GoPro Color, and Flat. GoPro color is the standard color tuning that you’ll get out of the box – higher saturation, contrast, and accurate colors. Previous versions of GoPro ProTune defaulted to Flat which is a more neutral color profile. Flat should only be used if you’re an experienced color corrector or are trying to match GoPro footage to other video sources in post. If you’re worried about dynamic range, Flat comes in a stop below GoPro color to give a bit more latitude in the highlights. Flat will appear to have more grain in low light because it pulls up the shadows; however if you apply either a ProTune LUT or basic curve over the footage, it will drop the grain into the blacks.
White Balance
White balance basically determines the color temperature of your footage (cool to warm). By default this is set to Auto which generally does a good job in all conditions. To lock off the color temperature, you can set this to the different Kelvin values between 3000K & 6500K. 3000K will cast your footage blue relative to neutral, while 6500K is quite warm/yellow compared to neutral. Lastly is a setting called ‘Native’ which won’t apply any WB correction matrix (formerly called ‘Cam-Raw’). If you’re going to change this setting, using the app or a screen helps quite a bit.
ISO Limit
ISO Limit tells the camera how bright it should get in darker scenes by affecting the digital gain added to the video. By default it’s set to 1600. This means in a dark room it will use digital light gain to make it brighter and compensate for the darkness. The brightness comes at a price, which is noisy footage (grain, spots, etc). As you set the ISO limit lower, the footage will appear darker, but also cleaner with less noise. ISO limit won’t ever affect video footage during daylight or in bright situations because the camera won’t need to use the extra ISO boost. 400 is the darkest/cleanest looking footage, while 6400 is the brightest and noisiest footage. I personally keep this at 400 at all times since I don’t ever want grainy footage.
Shutter
New in the HERO5, and recent updates for the HERO4 Black/Silver is the addition of manual shutter control. If you choose to switch out of auto, you have the option of choosing a shutter speed that is 1/x, 1/2x, 1/4x, 1/8x – x being your frame rate. So if you’re filming in 4K, you can have a manual shutter speed of 1/30, 1/60, 1/120, and 1/240 sec. Once you have manual shutter enabled, the camera will allow you to lock the ISO settings as well. On the back of the camera screen there is a small lock icon in the bottom middle of the display that will become visible once your shutter is locked. Lock that to enable ISO levels below 400 (200 and 100). In Karma and the app, there’s an individual line setting for ISO values to be Maximum or Locked – this is the same setting. This will allow you to fully lock the exposure levels of the camera and get clean dark blacks in lowlight. Typically if you’re in a bright daylight situation, manual shutter values let in too much light, requiring the use of ND filters. Manual shutter control is great for lowlight situations, such as use on Karma during sunset. *If you choose to lock the shutter and ISO, it will ignore your EV Comp setting if you have one.
Exposure Compensation
Exposure Compensation/Bias lets you tell the camera to always be slightly lighter or darker than normal. By default it’s set to 0. If you set it to +2.0, the footage will appear to be 2 “stops” lighter in all situations. In photography if you go up by 1 “stop” you’re doubling the amount of light that gets let into the camera. If you set the exposure bias to +2.0, the footage will be 4 times brighter than normal. Similarly if you set it to -2.0 it will be 4 times darker than normal. Careful when adjusting this – there’s no indication on the UI once it’s set – be sure to check this value regularly if you are prone to changing it now and then. I keep this at 0 for most things. On occasion if it’s a varied scene with a mixture of bright highlights and dark shadows, dropping it to -0.5 can help save some highlights.
Sharpness
The Sharpness setting affects just that – the digital sharpness in the video. A GoPro lens is only sharp to a certain point. After that digital sharpness is added to make the footage appear sharper. By default it’s set to high, which will make your footage pop and appear sharp. This setting allows you to lower the digital sharpness if you like a smoother looking video, or plan to add sharpness in post. I prefer low sharpening at all times to get smooth, clean looking video.
Electronic Image Stabilization (EIS)
The HERO5 touts new EIS software that helps reduce the small jitter or shake you’re used to seeing from typical GoPro footage. Basically the camera knows where it is in space at all times while you’re recording. It’ll use those tiny location changes to warp, rotate, and reposition the footage to keep a steady horizon. You will lose about 10% of field of view from the wide setting (because it needs to rotate/slide the image around), which is actually pretty minimal compared to other action cameras out there. GoPro optimized the amount of shake it would reduce vs the loss in field of view. If you switch into the medium FOV, combined with EIS, you’ll see a considerable improvement in the stabilization effects since it has that much more FOV to rotate/crop/adjust the original image.
When do I use EIS?
EIS is turned on by default in the HERO5, but when should you turn it off? In my experience EIS does an excellent job in reducing small shakes and jitters commonly seen in handheld cameras or vibrating mounted footage. If you’re doing POV or action, it depends on the activity and mount whether EIS is right for the job. The best use is if the camera is largely locked off in a single direction but shaking. For example, chest camera mountain biking would be a great use-case (one direction, but often shaky). I found head-camera skiing was a mixed case. It definitely makes it smooth, but gives some interesting effects when you start looking all around. It tries to pick center points to lock onto, so you’ll see the video footage sort of jump from one point in the frame to another part unnaturally. If you’re shooting in really dark environments you’ll get some interesting artifacts – so I recommend shutting it off for most lowlight capture. All in all, very impressive results, and it will be my go-to setting when hand-holding the camera for vlogging (if I ever vlogged), or when my mounting options aren’t super steady.
*EIS is available in all modes 60 FPS and below. EIS is not available in 4K.
Read my reviews of the modes for the HERO4 Black, OR HERO4 Silver/HERO3+