HERO5 & Karma Series
GoPro HERO5 Black
GoPro HERO5 Session – Coming Soon
GoPro Karma Drone
GoPro Karma Gimbal – Coming Soon
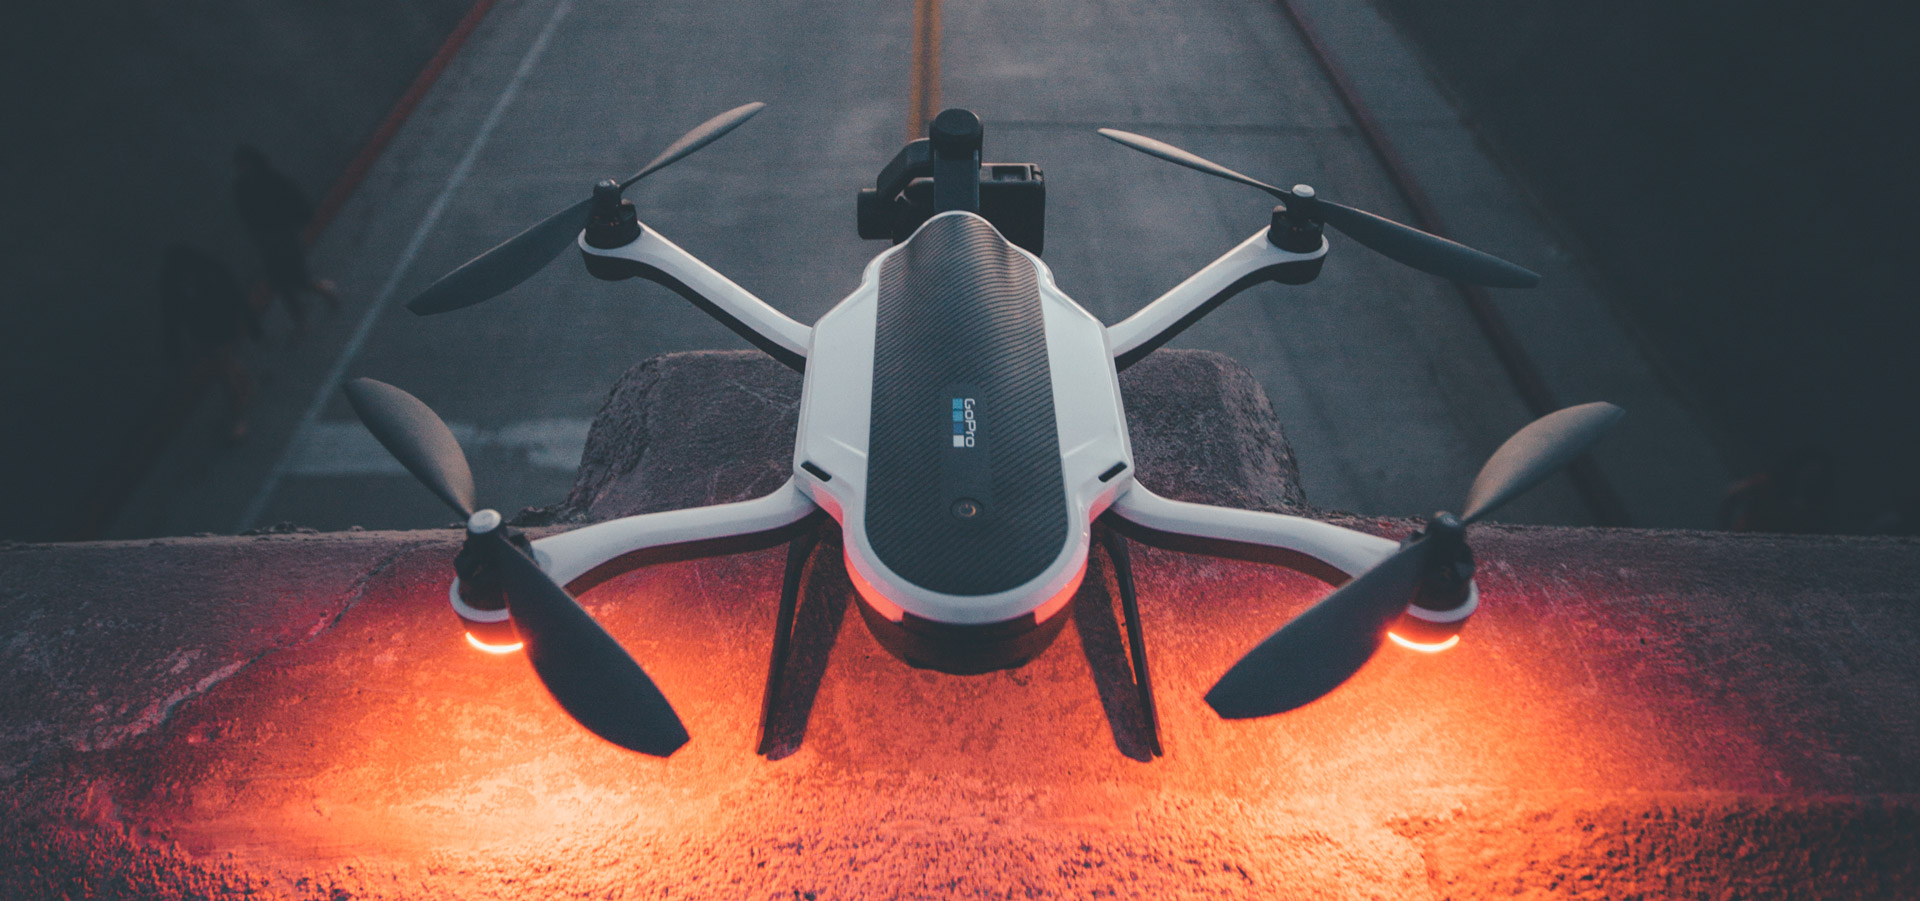
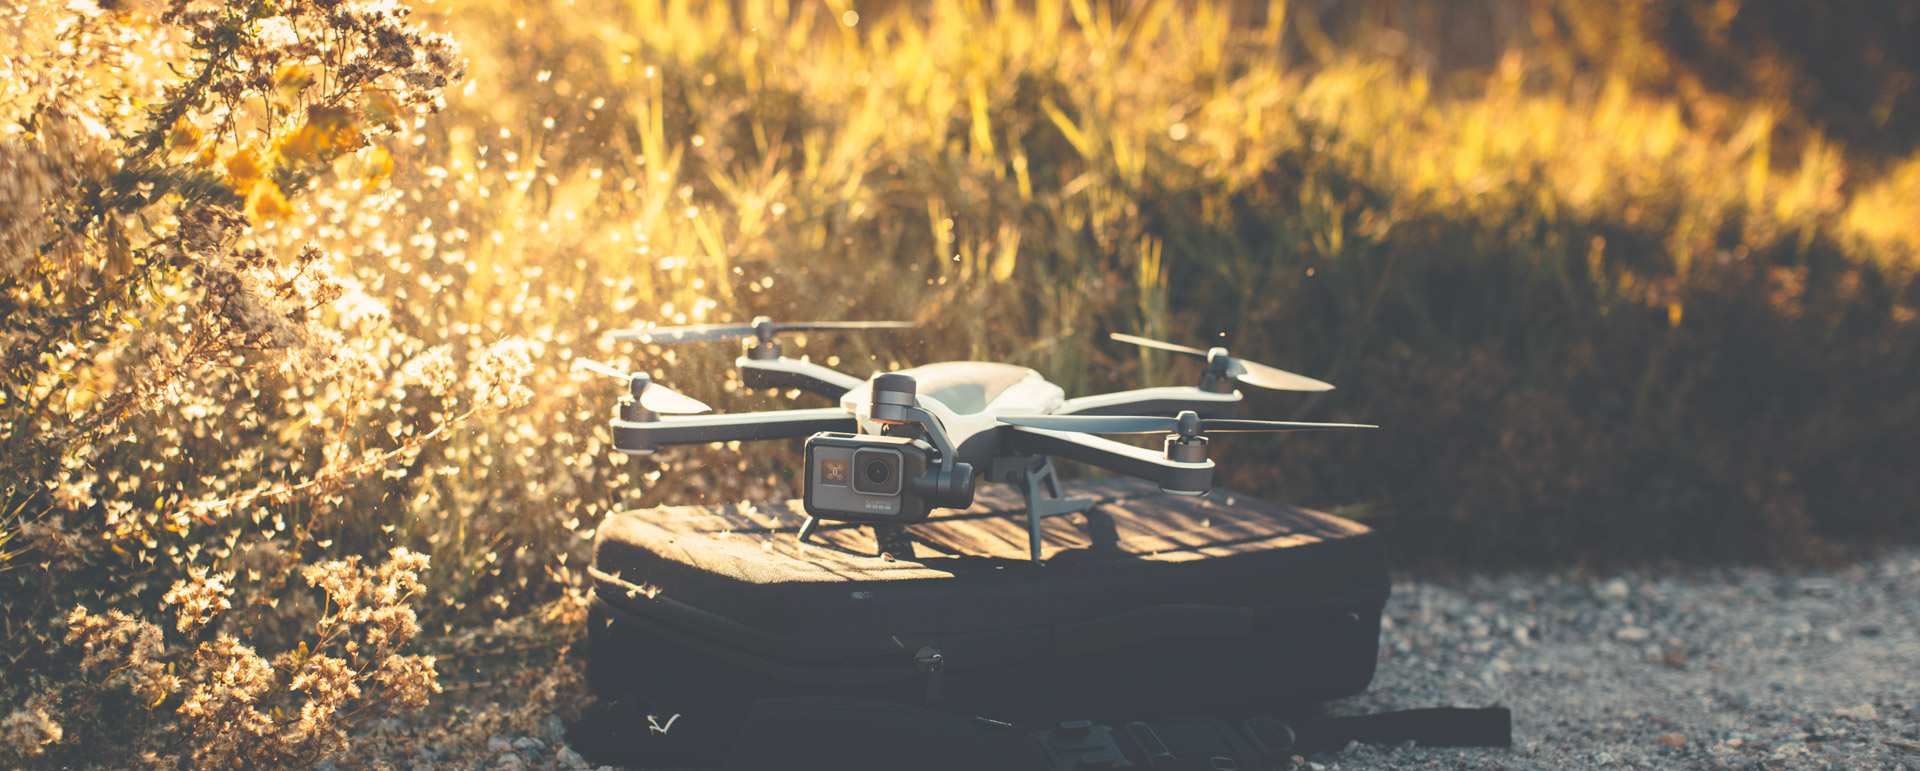
Karma Drone
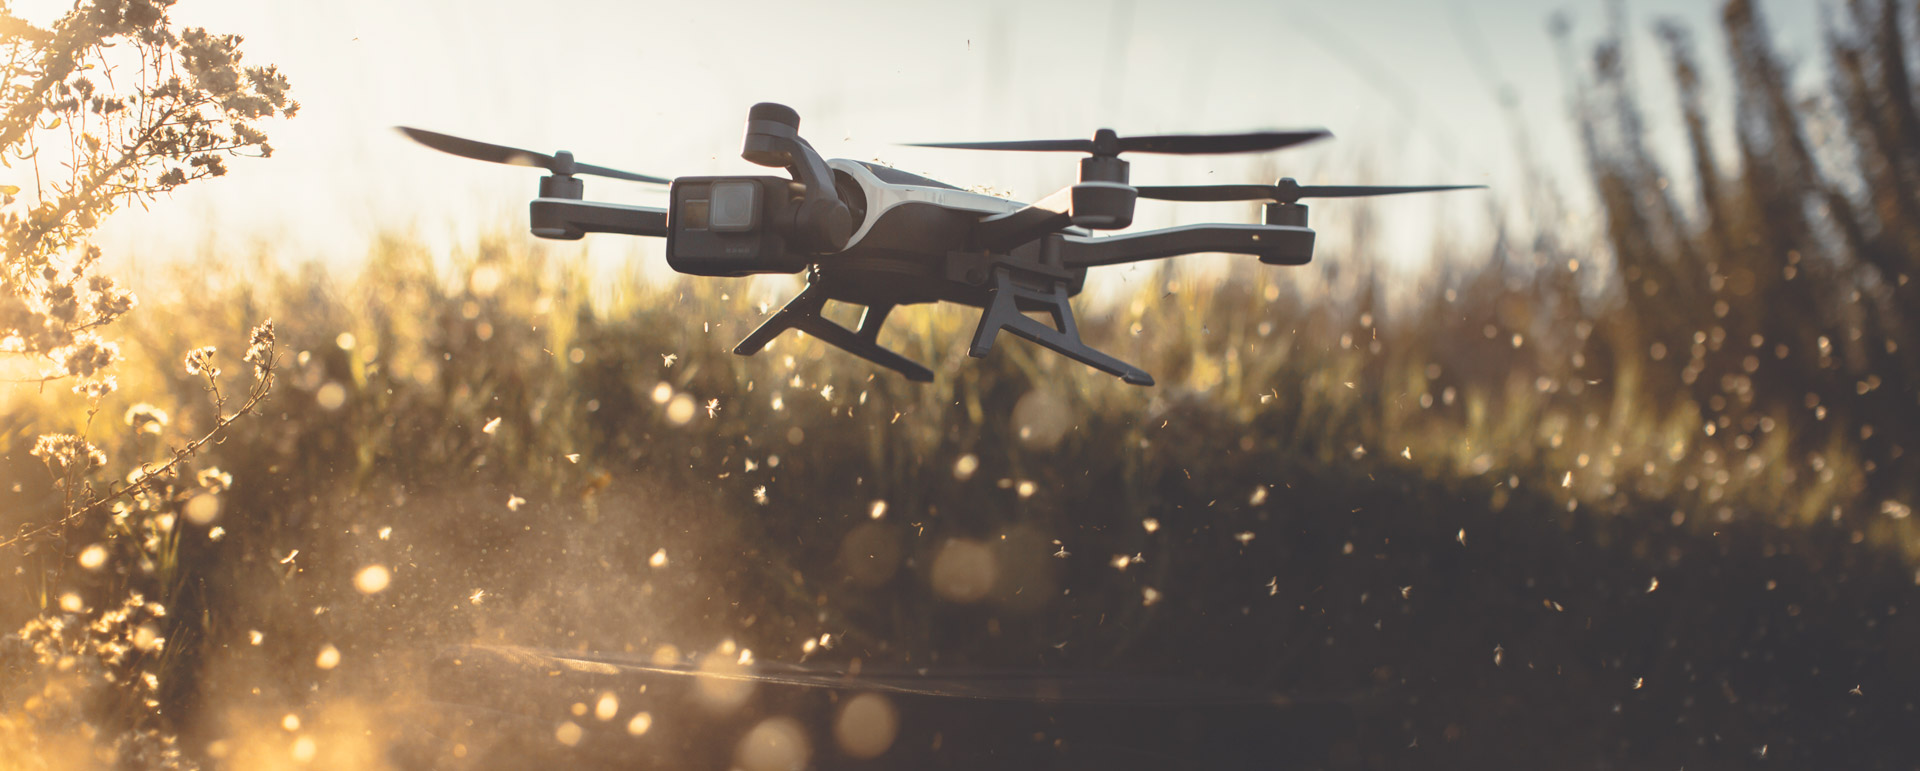
Technology has come an extremely long way in the past few years when it comes to drones. 5 years ago I was working on the GoPro media team (as I am today), and we wanted to try to get a GoPro on a drone to get some aerial shots of a Supercross race (moto bikes in an arena). It required bringing an octocopter, flown in a custom pelican case the size of a small go-cart which weighed over 100 pounds. It was flown by a trained UAV pilot that would assemble the octocopter on site, and use his expertise to convince the leaders of the Supercross program that it was safe to fly at the venue (while no one was around). So we got our aerial shots… of an empty track… and it was amazing. There were no gimbals or stabilizers, but that didn’t matter – simply getting a shot from the air was unique enough, stable or not! Fast forward to today: GoPro has come out with the ultimate setup in terms of consumer ease. Karma is unique in the drone space in that it’s geared towards non-hobbyist drone pilots – made for the everyday film/photo/gadget enthusiast. That’s not to say it can’t do what you need – it’s ultra-capable, but when you go through the experience of using Karma, you forget how arduous and difficult aerial video & photo capture has been over the last 5 years. This is how easy it should have always been!
GoPro never set out to beat DJI at its own game – they have a ton of resources and have been in the drone game for a long time. They make great products with awesome tech. There are a lot of comments online about why doesn’t Karma have this, why doesn’t it have that? To be frank, it takes time and resources to develop technology to get to where we want it & need it to be. What people forget is that it actually takes real human resources (brains & hours) to build a technology division from scratch, develop hardware and software that works in harmony, and get it to market. GoPro set out to solve the problems it can do, and do it well. User experience, portability, integration are the key factors that set it apart from the rest of the drone industry. Couple that with the GoPro brand recognition, and its extensive distribution in stores across the world, and you’ll have everyone and their mom’s knowing what a drone is, and where to buy one, by the middle of next year. As you [yes you] are reading my blog, it’s hard to imagine yourself out of the tech space that you probably exist in – but the everyday mass consumer probably doesn’t know DJI – in the same way that when I started rocking a GoPro on my head everyone asked me what it was. Out of habit, now, when people ask what I do, I say “I work for GoPro”, then make a little gesture with my hand in the form of a camera on my head and say “the little sports camera”. I’m always met with a response of “I know what GoPro is, duh!”. Well, drones are still in the vein of onlookers saying “whoa, is that a drone? Where did you get it? How much does it cost? How far does it go?”. GoPro has the power to change that in a very short amount of time.
I’ll address the DJI Mavic, because I know you’ll ask. Are GoPro and DJI in similar spaces? Yes, if you look at it solely as a drone; however, at the end of the day they are entirely different products. With Karma you’re buying into a system – an end to end filming solution. It’s a drone, a handheld/mountable gimbal, and an awesome waterproof camera for everything else in your life. Yes, you can go out and solve all of your needs by buying this or that to make ends meet, but GoPro delivers it all together with the quality, support, ecosystem, and brand affiliation/recognition. Of course I think the Mavic is awesome – I’m a tech geek at heart, which is why I do what I do. I welcome anyone/any company that strives for technological advancements. Will I get one? Probably not; I’ve got my Karma system and it delivers everything I need & more as a filmmaker personally. Does that mean it’s right for you? That’s your choice to decide what your intentions are and what you’re looking for. It’s easy to get wrapped up in specs or online comparison charts to determine whether a product is good or not. For me, I think about what my intentions are with the product, and if what I’m buying suits those needs. I’ve wanted a drone that I can get aerial shots to cut to in video as well as the ability to take some sweet aerial photos. Karma, as a drone, does that perfectly, and with very good results. Karma was built with filming in mind and so everything from the stabilization, to the flight movements, to the gimbal are all catered to being buttery smooth for professional looking video. You have filmmakers helping sculpt the product in terms of usability, function, and future updates. Also, the gimbal is the perfect accessory to get unique content where I can’t fly a drone – which I use as much or more than the drone itself.
User Experience
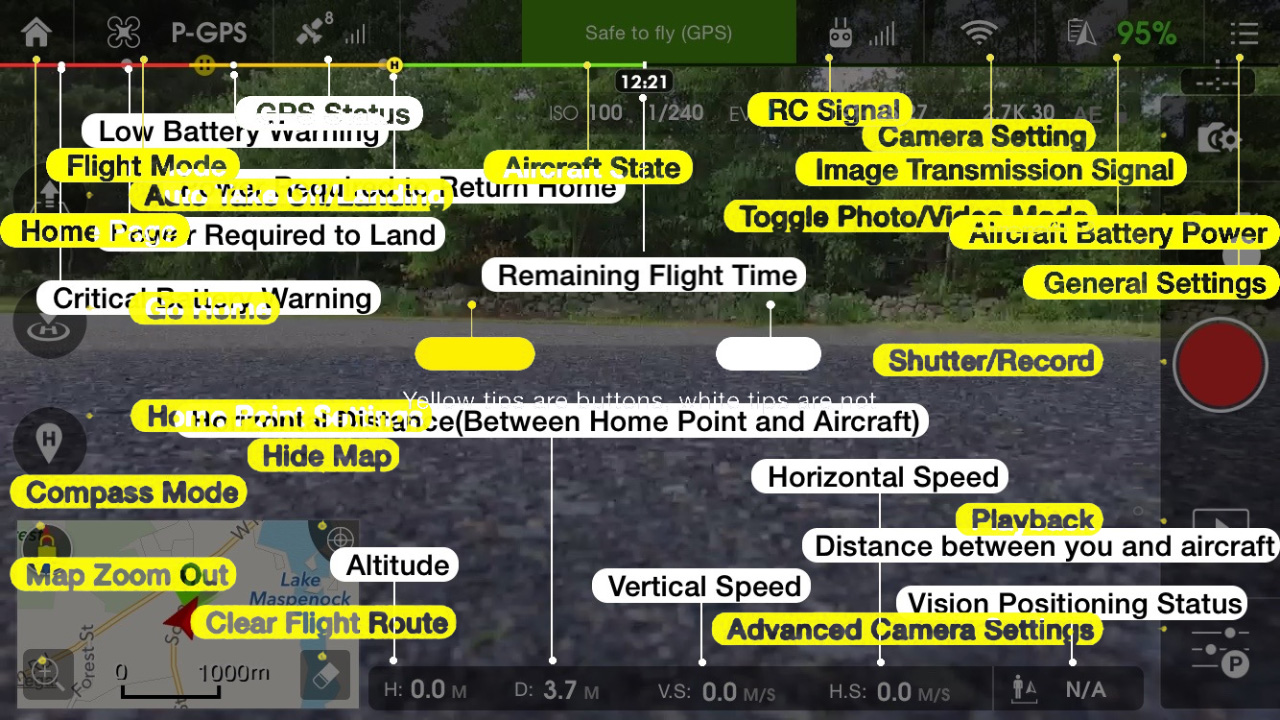
The experience out of the box feels easy and helpful – at no point are you questioning what to do or what different things mean. If you take a look at any other drone, the display is cluttered with telemetry data, graphs – it all feels very RC hobbyist. It’s been getting better, but at the base of it, all other drones came from a very “industrial” RC background. It’s like comparing a PC to a Mac. PC at its core was built from a platform to do real business-y work. Apple was built around an experience – geared towards creativity. Karma feels different in that it’s made from the ground up to solve very specific issues such as experience and ease of use.
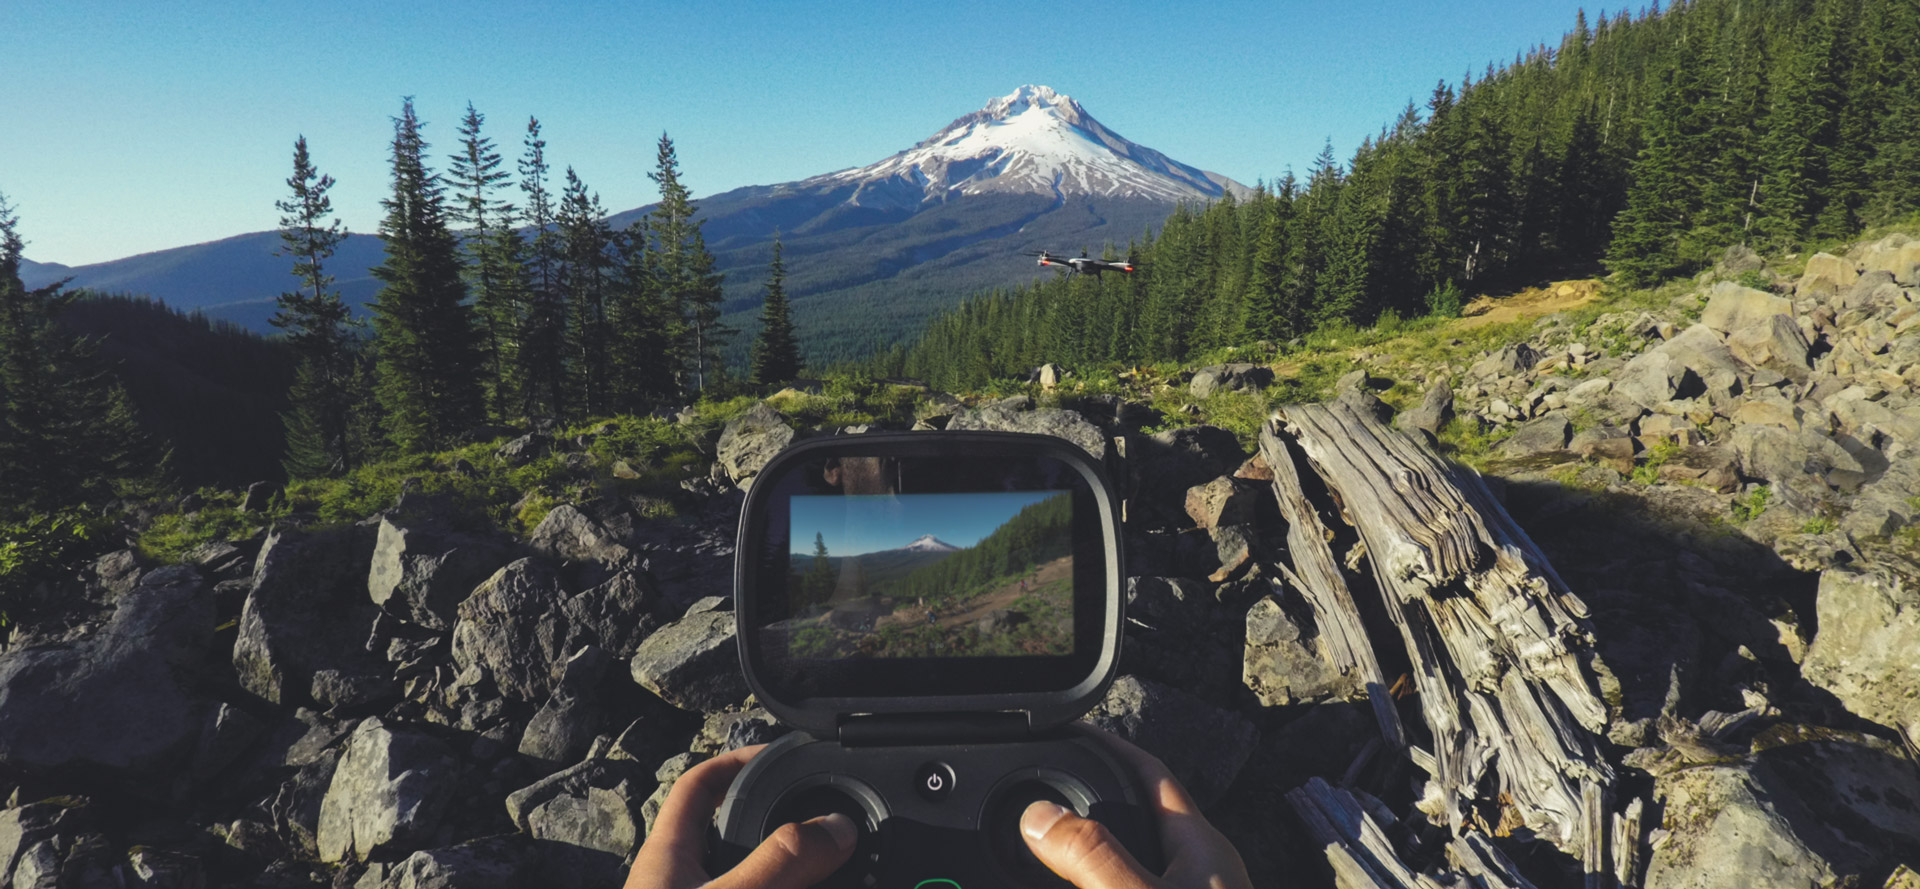
Portability
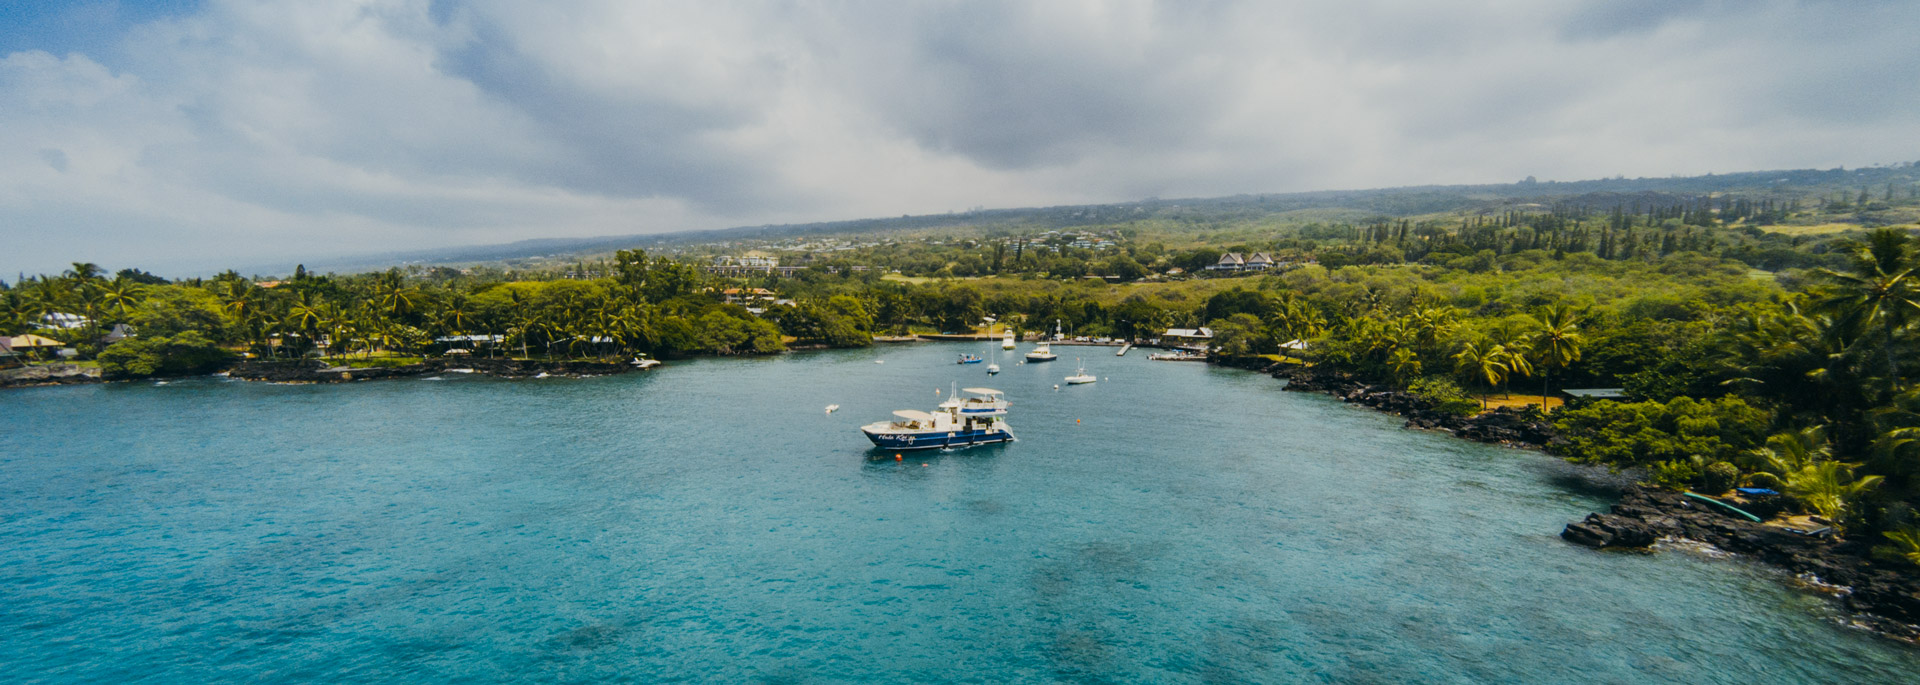
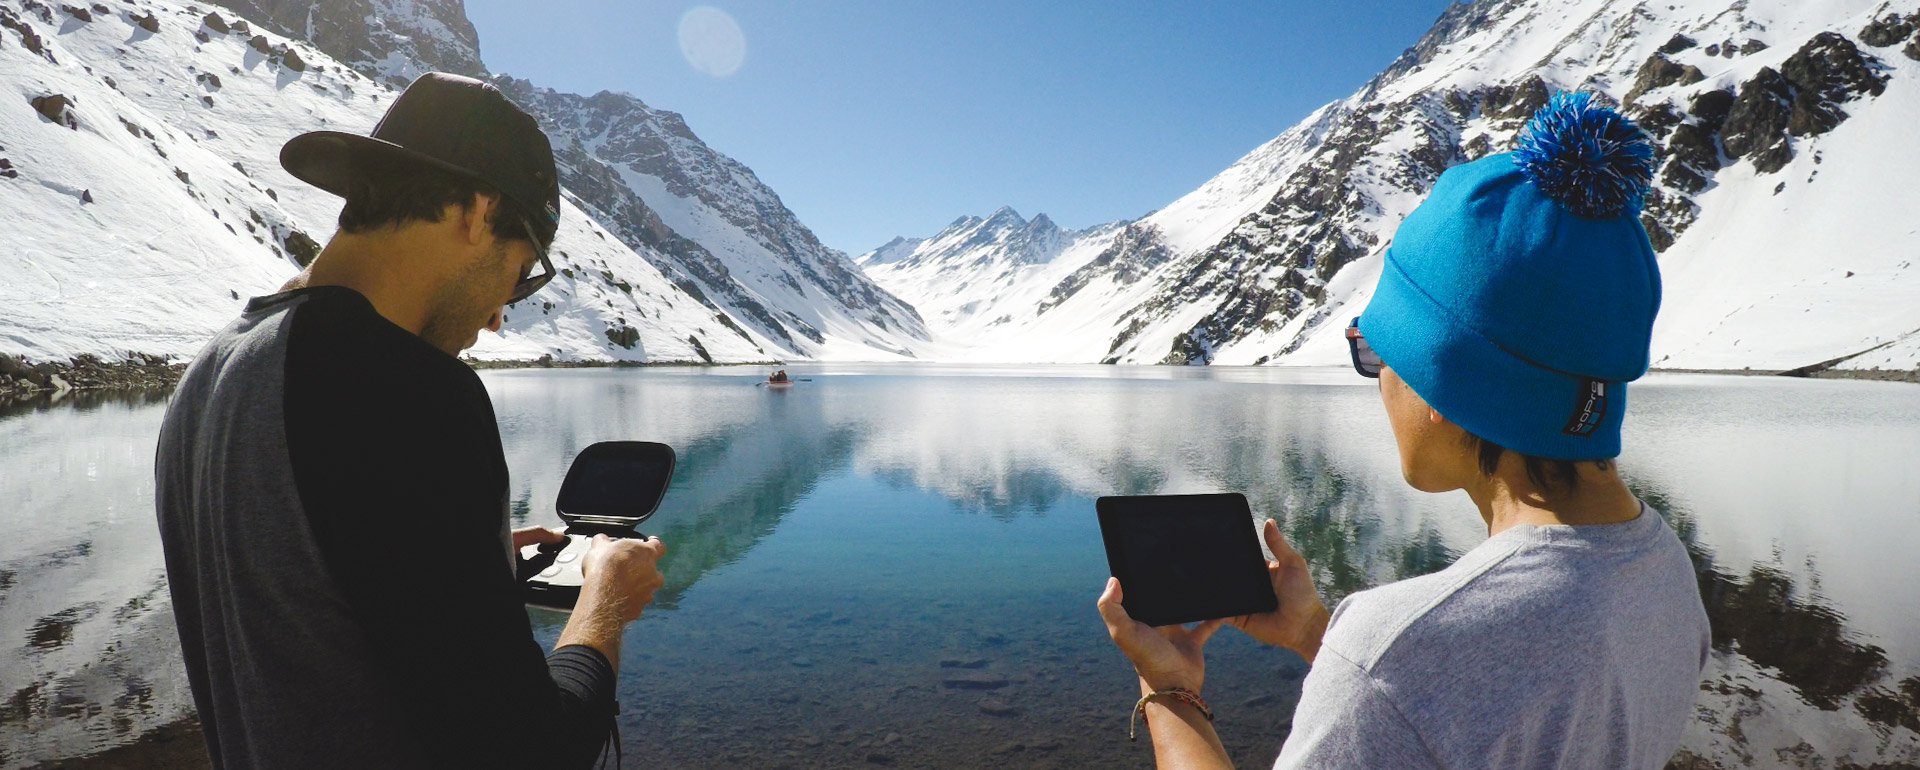
You can never underestimate the power of portability when it comes to drones. Most of the time the shots you want to get aren’t on the side of the highway, they’re deep on a hike, or up on a mountain, places where carrying a drone previously was very difficult. Just ask Caleb Farro how it was hiking 5K vertical feet in the Chilean Andes with his Phantom 2 last summer 🙂 Karma was designed to be ultra portable and self contained. Everything you need fits in the included backpack hard case. It’s slim and doesn’t feel heavy or get in the way of your activities. Also, one of the big advantages is that it doesn’t require your cell phone to control – the Karma controller comes with the integrated touch screen with everything you need to fly.
Integration
No one can integrate GoPro into a drone better than GoPro. You have full access to the camera from the Karma controller; it’ll even check and download new firmware for your camera if it’s not up to date. The Karma controller has buttons for mode & shutter, just like the camera. At any point during your flight you can start/stop recording, change modes, change camera settings, and more. You use the touch screen for more intricate camera settings changes, and the buttons for quick mode changes and recording. On the other side of the controller (opposite the camera buttons) is a wheel to control the angle of tilt of your camera. Beyond the full control of the camera, the drone has preset shots built in that make it fast and easy to capture cinematic shots like cable-cam, dronie, orbit, and reveal. More on these below. If you want to upgrade your camera, GoPro has made the gimbal forwards and backwards compatible with a simple harness system that unscrews from the main gimbal assembly. HERO4/HERO5 harnesses for the gimbal can be purchased from the GoPro site for $29.99. Similarly, replacement parts can be easily purchased online if anything gets broken on your Karma, including the entire core of the drone. Rather than getting entire new systems for full-price when something goes wrong, you can expect to do cheaper, incremental upgrades to your main system.
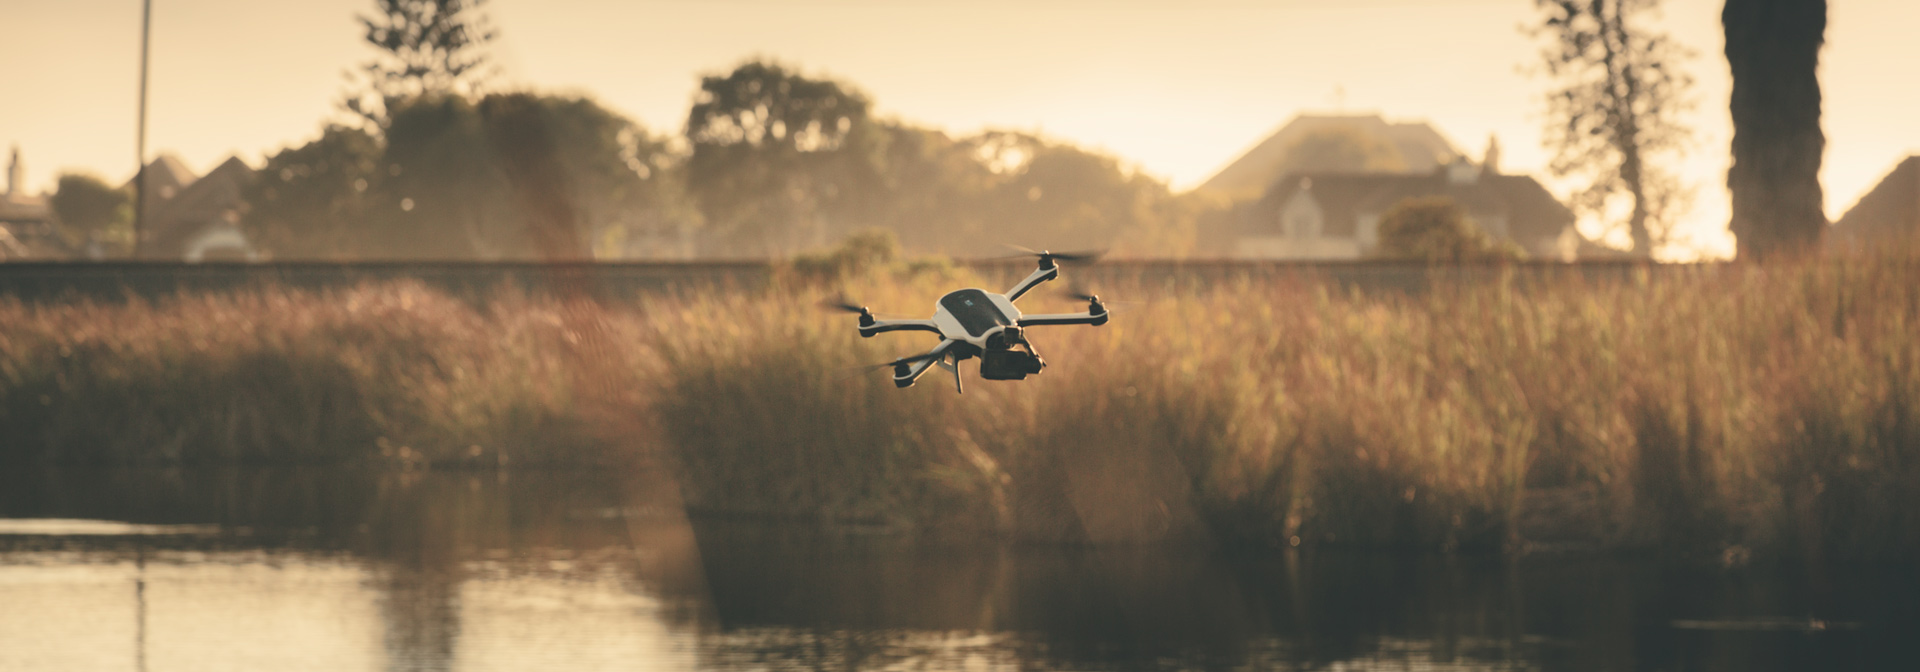
Quality & Performance
Engineers labored over the integration of the gimbal and the drone together to create the smoothest aerial video I’ve ever seen from a drone + GoPro system. I can easily spot if footage was shot on a Phantom or 3DR because it doesn’t have the same professional, smooth look to the video. The quality and stability adds an indescribable layer of ‘gloss’ over your footage that will set it apart from content shot from other drones on the market. Performance-wise, Karma jets around in a sleek profile and feels more like a futuristic spacecraft than a piece of consumer electronics. [EDIT] – Just found this video online from PeauProductions which makes note of how smooth/stable the gimbal is. They’ve attached an ultra-narrow lens to the HERO4 on Karma, which would make light of any jello or jitters in the gimbal.
I’ve tested Karma in 35 MPH gusts and it holds up fine. Also, shooting long exposure photos at night from Karma yields sharp images.
In the following section I’ll be outlining all of the steps I take to setup Karma, and what settings I’ve found work best for certain situations. I wouldn’t consider myself a drone expert, but I have logged probably 20-30 hours flying Karma out in the field so I’ve done a lot of experimentation.
Setting up your Karma System:
Pair your Karma to the Controller
If you’ve just purchased a Karma, the controller and Karma will come paired out of the box. If you need to pair, do the following: Power up your Karma controller – hold off on turning on your Karma. Press the menu button in the top left of the Karma controller screen once it’s on. Press ‘Connect > Pairing’. Follow the instructions on-screen. If you’re already paired, you’re good to go – otherwise pair or hit ‘UNPAIR’ and go through the process. You’ll hold down the power button on Karma until the light on the power button (under your finger) flashes dark blue, and the lights under the arms flash. When it’s flashing, you’ll hit pair, then complete the pairing process by pressing the power button on Karma. Make sure you press it solidly and firmly.
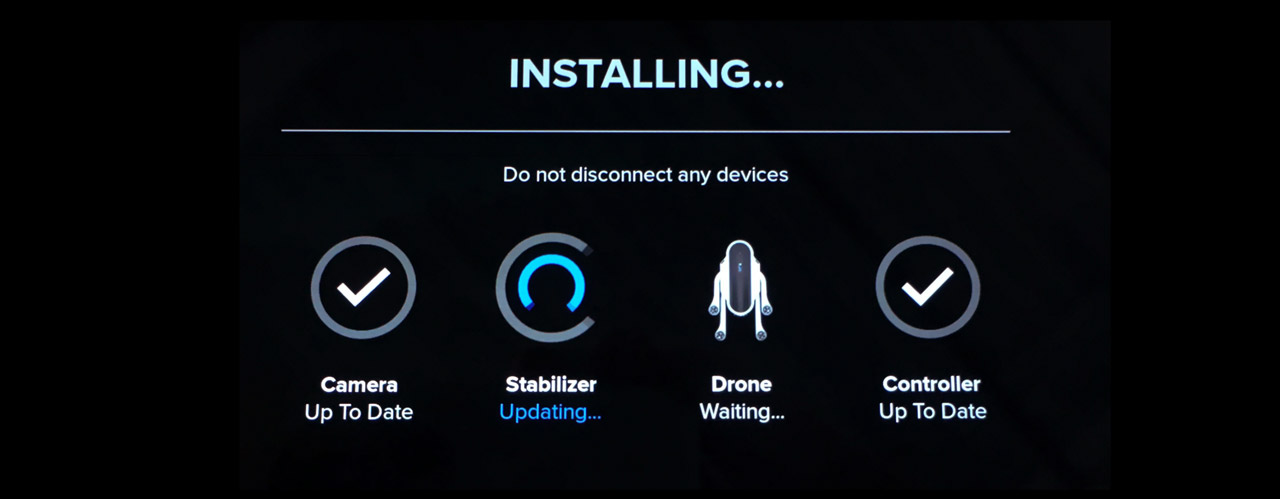
Get your Software Updated
Before you get any further, check if all of the firmware and software is up to date on all devices. Make sure your drone is connected to the controller with the gimbal plugged in with camera + SD card. Connect to your home WiFi network by pressing the top-left menu button on the controller home screen, then pressing ‘Connect > Wi-Fi’. Turn on your WiFi and find/connect to your network. If there’s an update available, the controller will let you know with a pop-up. There are separate software versions for the drone, the gimbal, the controller, and the camera. The updater will check all of them. To see what your current software versions are, click the menu button on the home screen then ‘About > Devices’. If you only turn on the controller, it’ll download the software updates for all of your devices and install them later when connected.
Before you Fly – Flight Control Setup
Once your Karma is on, connected, and ready to fly, there’s a few things I like to setup first. Access the following settings by swiping up on the KARMA logo on the home screen, then pressing the settings button in the bottom left hand corner. To exit any menu, tap in the open space to the right or left of the menu items.
Easy Mode
By default, Karma is set to Easy mode ON. Easy mode is basically super mellow movements and low speeds. It could be good if you really want that epic cinematic shot and you don’t think you have good control over the sticks yet, but I always disable this straight away.
Flight Limits
By default, Karma is limited to 400 feet vertically, and 3,280 feet horizontally from you. You are able to de-activate the limits, or adjust them to shorter distances. I tend to keep the distance limit on so I don’t accidentally go too far. At any point you can see on-screen how far you are, but it’s easy to forget to look. Keep in mind the legal vertical limit is 400 feet.
Camera Tilt Speed
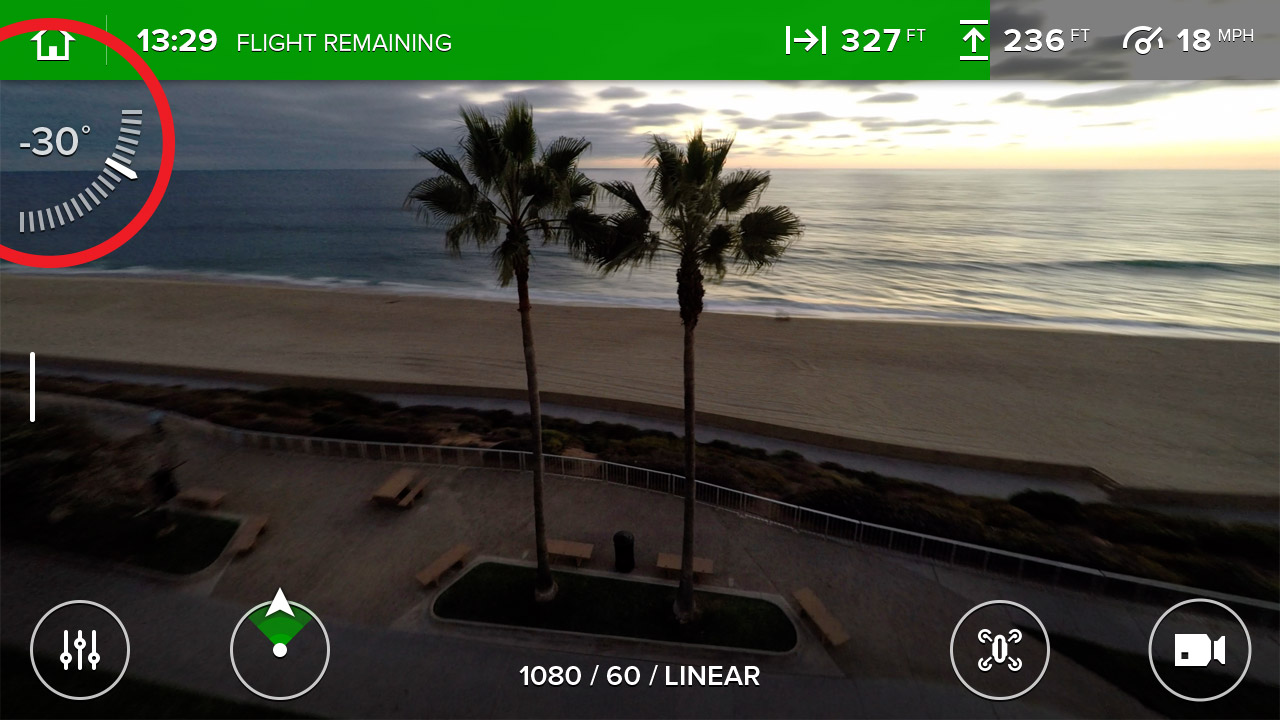
There are 5 gimbal tilt speeds. I typically keep mine on the slowest (1) because it yields the best cinematic long tilts. At any point if you’d like to change the speed while you’re flying, just tilt the gimbal so the display shows the tilt angle degrees in the top left. When that’s on-screen you can tap it and adjust the speed on a slider. Once you learn the controller tilt wheel, you can really get a nice ease on the tilt by slowly increasing the tilt.
Camera Tilt Direction
This is which direction the controller wheel will tilt the gimbal (left goes up, right goes down, or vice versa). This is entirely based on preference – I always like mine to be inverted.
Calibrations
Before you ever launch your drone, Karma will make you do both the compass & accelerometer calibrations. Follow the instructions on-screen; each one only takes about 30 seconds to complete. When you’re doing both of them make sure you’re outdoors and far away from electronics or large metal objects. Karma is pretty sensitive to metal objects so if it says cannot calibrate or compass interference, try to get to a more open spot. I’ve had it not want to take off from the top of parking structures or on large metal docks. Sometimes it can be as simple as launching out of your hands away from the metal in the ground. Also, anytime you travel to a new spot geographically (new country or large change in location) it’s wise to re-calibrate once.
Before you Fly – Camera Setup
Setting up for Video
90% of the time I like to fly with 4K because I enjoy the high resolution and crispness of the shot. You’ll want to get ProTune dialed before you take off so you’re not adjusting too much once it’s in flight. Here are my go-to settings for most flights:
4K-30 Wide
ProTune: ON
White Balance: Auto
Color: GoPro
Shutter: Auto
ISO Limit: 400
EV Comp: 0 (sometimes -0.5, depending on scene)
Sharpness: Low
If I’m not shooting 4K, I’m usually shooting 2.7K-60 OR 2.7K-30 with Linear Mode ON. Linear mode corrects for the GoPro fisheye directly in the camera by using the lens profile information to distort the image. You’ll lose a bit of field-of-view, similar to shooting medium, but it makes the lines in your video come out looking straight, which is great for drone-use. Linear mode is found in the ‘Field of View’ settings for that resolution. It’s not available for 4K.
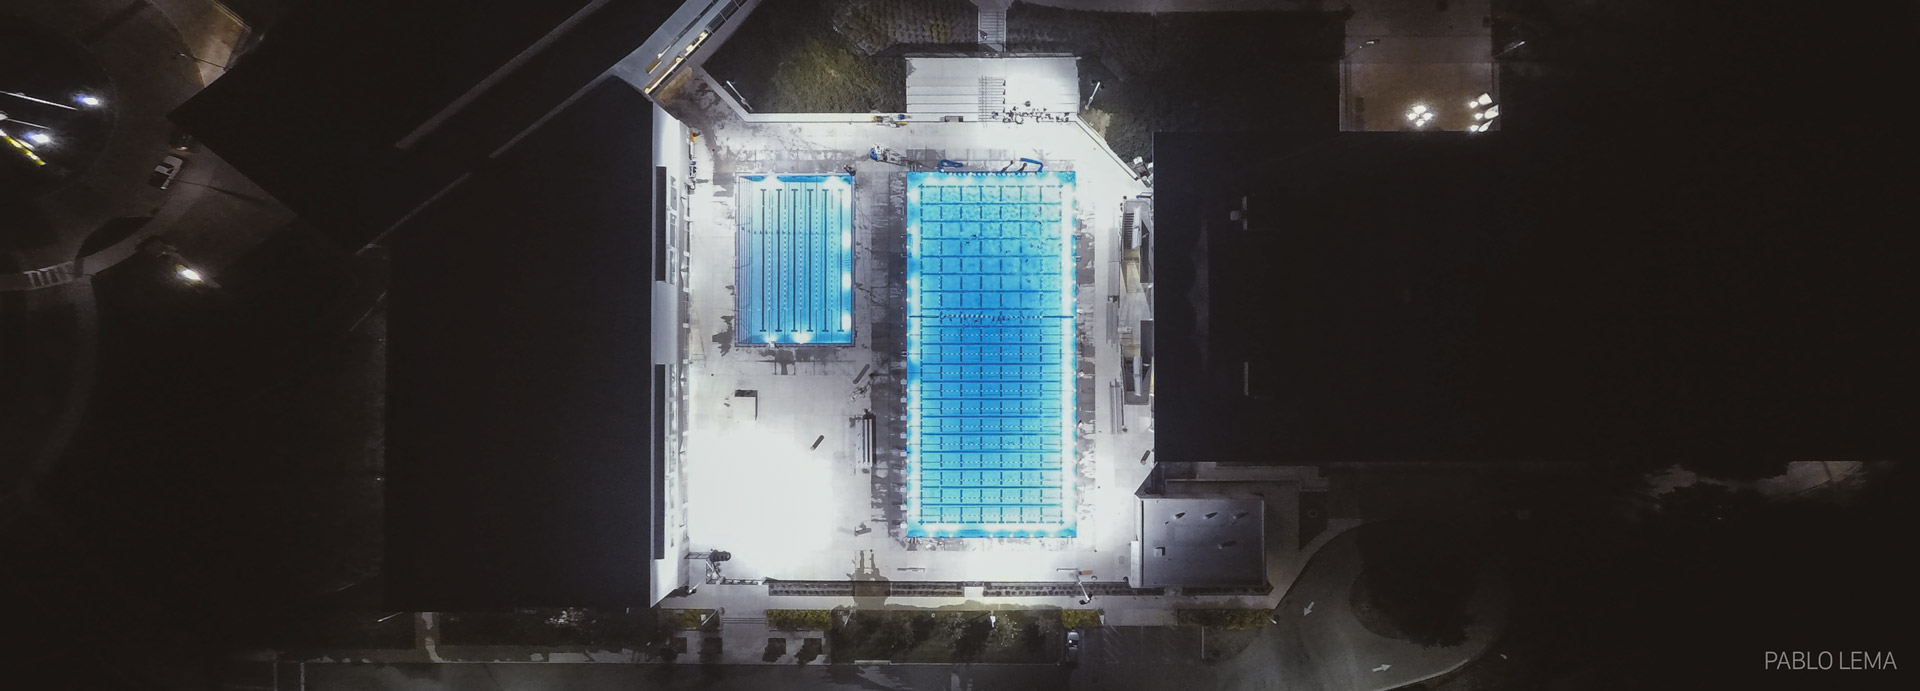
Pro Use for Cinematic & Rich Footage
When I’m dealing with lower light (sunset, or shade), or I have access to ND filters, I will almost always choose to lock the shutter, WB, and ISO. I’ll set the following settings:
WB: Depends on Scene (Check Karma Controller screen while you cycle through options)
Shutter: 1/60
ISO Max/Lock: Lock
ISO: 100
Locking these settings allow you 3 main things: A locked color and brightness no matter where your drone points, cinematic motion blur from elongated shutter time, and clean rich footage from low ISO.
Unlike typical GoPro footage, the scene from a drone changes drastically depending on where you point. If you’re looking into the sun it’ll expose for that, but when you look down, it’ll think the whole scene is dark and it’ll auto-expose up. Some of my footage looking down has a slight washed out look from the camera auto-exposing up and coloring it to be neutral. Instead, lock the shutter/ISO to a lightness that works for the general scene looking straight out. Once you look down, the camera will keep that exact lightness and color, giving you dark and rich tones.
A slower shutter speed will give your footage a wonderful cinematic motion blur. Typical shutter speeds are on the order of 1/1000 or faster, so when you lock it at 1/30 or 1/60, the camera is letting in a ton more light than it’s used to. With GoPro, there’s no adjustable aperture, so we need to look to neutral density (ND) filters to make the scene darker. ND filters are basically like sunglasses for your GoPro. Typical ND values are 64, 32 ,16, 8, and 4, with each one letting in twice as much light as the previous (4 being the lightest, 64 being almost black). I’ll tend to start with ND 8 or 16 with a goal of my shutter speed being 1/60. If I need to set shutter speed to 1/120, or 1/240 that’s fine. As it gets darker, you’ll set shutter speed slower until you’re at 1/30 (you can only set your shutter speed as slow as your frame-rate – so 1080-120 can only go down to 1/120). As it gets even darker, you’ll move down a stop on the ND to an ND 4 or 8 (depending on where you started), and reset your shutter to 1/60. As it gets darker still, switch to 1/30, then pull the ND off entirely. Switch to 1/60 again and down to 1/30. It’s a bit of a dance with shutter speeds and ND filters but it’s usually over the course of a battery change that I’ll need to swap ND filters – so it’s not a big hassle. Check the screen on the Karma controller and make sure the light levels look correct and adjust the shutter speed if necessary. Once it gets really dark and you’ve reached the limit of 1/30 with no ND filters, you can start pushing the ISO higher. Start with 200, and then 400. With a locked ISO, anything higher than 400 will end up looking pretty grainy.
If you’re looking to get ND filters, PolarPro has some great ones.

Locking ISO at 100 will give your footage a richness and cleanliness you’ve never seen before from a GoPro. ISO is basically the digital light gain to make the scene brighter. In auto shutter mode, ISO 400 is the lowest value we can go, but even 400 has a good amount of noise/grain. Once the shutter is locked, ISO 100 will become accessible (*not available in current firmware version – coming soon). ISO 100 is the ultimate setting for clean/rich footage. Above is a screen grab from a 4K file completely raw.
Setting up for Photo
Photos are awesome to have from your flights, and Karma makes it easy to switch between all of the different modes. I utilize single photo mode & time-lapse mode to have 2 different photo “presets” while flying. One limitation is that you can’t shoot RAW photo with the Linear FOV. As I explained above, Linear FOV is great for drone use. It’s easy to do a lens correction on photos in Lightroom to simulate the linear mode, but a lot of the time I’m looking to share photos on the go, straight from the camera. What I’ll end up doing is setting up single photo mode in RAW, and setup time-lapse mode to Linear. This way I can snap a couple RAW photos of the scene to edit later on my computer, then switch over to time-lapse and get a couple quick photos that I’ll be able to share instantly on Instagram stories/Twitter/Facebook. Here are the settings I use in photo modes:
Single Photo:
Field of View: 12MP Wide
RAW: On
Spot Meter: Off
ProTune: On
White Balance: Auto
Color: GoPro
Min ISO Limit: 100
Max ISO Limit: 400
EV Compensation: 0
Sharpness: Low
Timelapse, Burst:
Interval (Timelapse): 2 Seconds (allows for video preview between saving photos, vs no video preview in 0.5/1 sec)
Field of View: 12MP Linear
Spot Meter: Off
ProTune: On
White Balance: Auto
Color: GoPro
Min ISO Limit: 100
Max ISO Limit: 400
EV Compensation: 0
Sharpness: Low
Ready to Fly – Basics
Launching & Landing Karma
When you’re taking off, there’s two ways to get it off the ground. First, press and hold the start/stop button. The props will fire up into stand-by mode. From here you can either press “Auto Take-Off” on the screen, or simply push the left stick forward. If you let the props idle for too long, it’ll automatically shut them down. It’s a great idea to take off in a pretty open space in case the drone needs to return to home and land automatically.
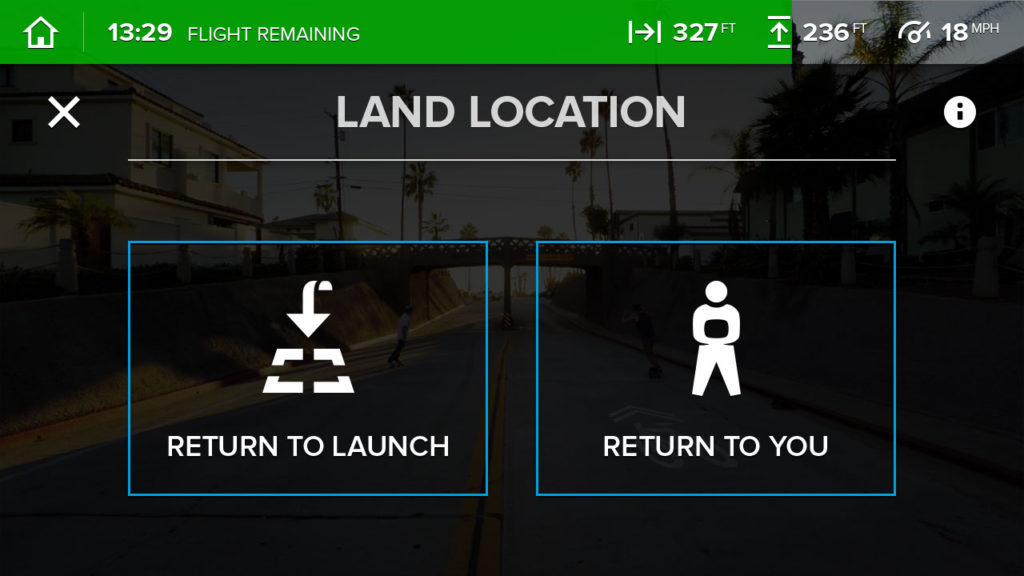
When you’re landing you can just bring it gently down and the props will turn off when it senses that it’s on the ground. I tend to hold the left stick down just to make sure. Your other option for landing is pressing return to home/user – the physical button below the start/stop button. This will give you the choice of landing back where you took off (return to launch), or where you are (return to you). At any point you can exit out of the auto-return sequence and bring it down manually. When auto-return is initiated, it’ll first fly up to an altitude of 100 feet (adjustable in ‘Flight Settings > Flight Limits > Return Altitude’), race back to you, then descend straight down over the landing location. Auto return is pretty rad if you’re far away and just need it to get back to you. I tend to take off in a spot that has plenty of room around it (away from trees or people), just in case it needs to return home automatically. Also, stay away from trying to land on small areas with ledges, or uneven terrain. It goes without saying, but if Karma tips over while the props are on, they’ll break off (easily replaceable though). Lastly, if you press and hold the land button for 3 seconds, Karma will initiate a land-in-place sequence.
You can launch it out of your hands fine, just make sure it’s pretty level when you’re launching it and you give it a decent amount of lift before letting go. Catching it, make sure it’s flat in your hands so the motors know to turn off. It’ll feel like it’s taking a little bit but just hold the left stick down while holding Karma level and it’ll eventually shut down.
GPS for Flight
A GPS signal isn’t required for flight, but if there’s any sort of wind, it’s extremely helpful and pretty necessary. Unfortunately if you’re inside, or under a thick forest canopy, Karma won’t be able to get GPS. If you find yourself in a spot that’s not getting it right away, try moving it more out in the open (away from large cliff walls or tall buildings).
No GPS
If you can’t get GPS and you absolutely need to fly it’ll just ask that you verify you’re an expert pilot by pressing and holding the thumb print on the screen. You’ll need to watch Karma pretty carefully while it flies because it’ll drift with the wind; however, altitude will stay locked. If you don’t have a GPS signal you also won’t have access to auto-shot paths, return to launch location, flight limits, or no-fly-zone limits.
No Controller Input, Auto-Land Fail-Safe
If there’s no GPS and it doesn’t sense any controller stick inputs for 5 or more seconds, the controller will tell you Karma has lost signal and is landing in place. It assumes that if it has lost GPS and the user isn’t controlling it, it’s flying away and will auto land for you. No problem, all you need to do is give the sticks an input and it won’t land. I’ve had this happen a number of times while I’m flying while getting a smooth shot by letting it drift with the wind without controlling it. I thought the controller was bugging out but it was really just the fail safe.
Controller Lost Connection
In the event that your controller freezes or loses connection don’t panic! Provided there’s GPS, Karma will safely bring itself back to you (if it can find you), or at the very least, back to the launch location. If you’ve moved a significant distance from your launch location over the course of the flight, Karma will opt to fly to you, rather than the launch spot. It’ll lower itself down, land, and shut off the motors. If connection is re-established on the way back, you can exit out of the return-home sequence by pressing the ‘X’ on screen in the lower left. For these reasons, I tend to take off in an open/flat zone without any obstructions above me, as well as try to keep myself in a pretty open zone, should anything go wrong.
Flight Restrictions
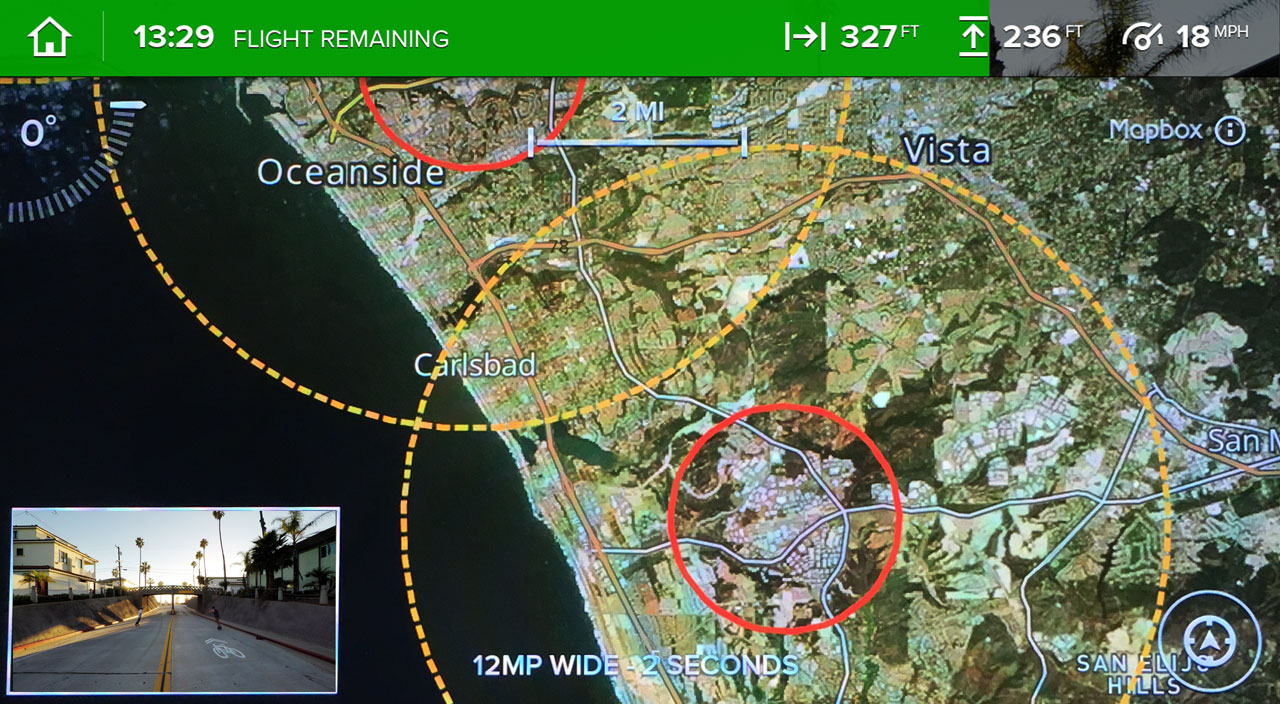
Karma is automatically restricted from flying within 1.5 miles of any major airport. If you’re within 5 miles of an airport it’ll tell you it’s in a no-fly zone but you can accept the terms and still fly (up to 1.5 miles out) – denoted by yellow dotted lines. The Karma controller will show the circles of no fly zones in red on its map. You’ll need to have downloaded the maps previously or have internet to show the map portion, but the no-fly limits will still be displayed in relation to you without internet. You can always setup a personal hot-spot on your phone, if you have a device that supports it, and connect your Karma controller to your WiFi connection.
Pressing Record
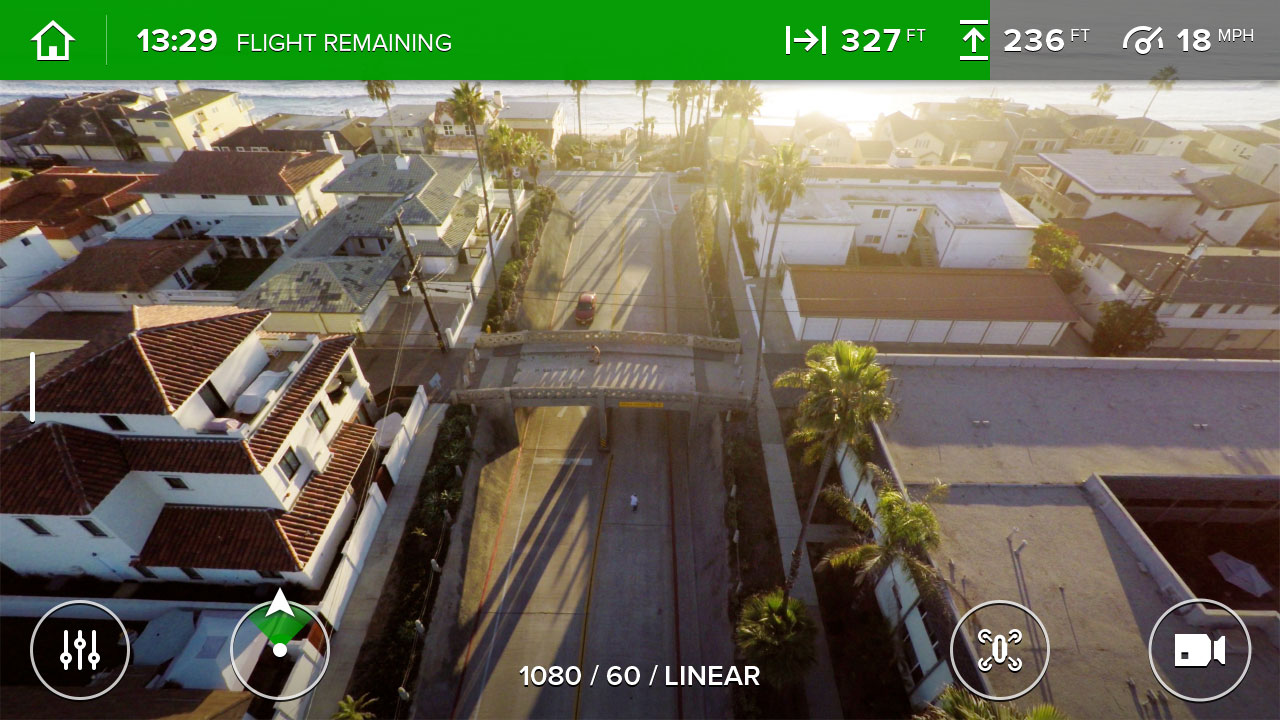
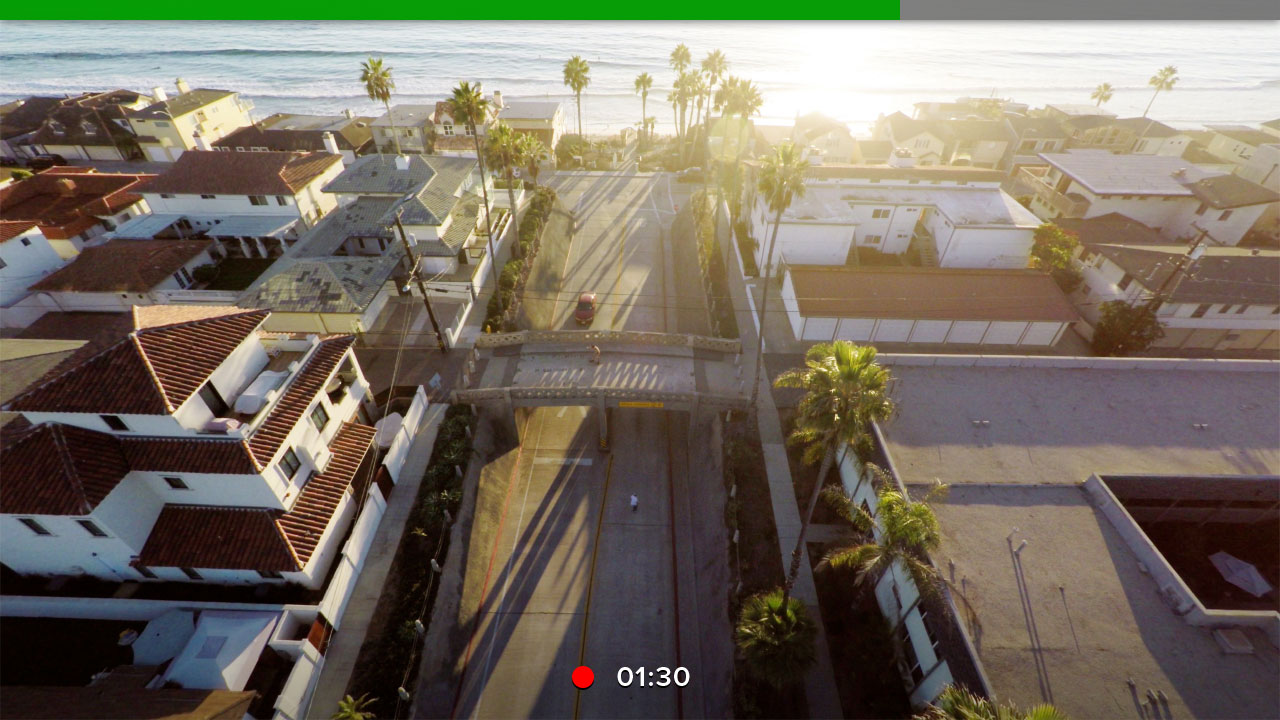
As silly as it sounds, the first couple times I started to fly Karma I forgot to press record (I was so used to doing it manually on a Phantom 2 before I would fly). Now I make it part of my pre-flight check. As soon as I’m ready to take off, I hit record every time using the button on the top right of the controller. You’ll see a timer and a red dot on the bottom middle of the screen. While recording, if you hit the mode button on the top right of the controller it’ll add a HiLight tag to your video. If you want to switch modes, you’ll have to first stop recording using the shutter button on the controller. Sometimes it can take a second or two to stop the video, just be patient before swapping over.
Switching between Video, Photo, Burst, Time-lapse
You can switch modes by tapping the video/photo icon on the screen; however, you can also use the mode button on the top right of the controller. It’ll cycle through the modes just like you’re used to on the GoPro. I like using this because it’s fast and I can do it without looking or taking my hands off the sticks. It’s great to come away from a flight session with different kinds of media, so remember to switch it up while you fly!
Minimize Heads Up Display
When you’re in flight mode on the controller, tap the screen once to make all of the on-screen icons disappear. It’ll leave a little battery meter at the top. I like to fly like this so I can frame my shots properly.
Settings Menu Exit on Stick Inputs
Just so it’s written somewhere so you don’t get frustrated not knowing what’s going on – If you’re in any of the settings menus while flying and adjust the controller sticks, it’ll exit you out of the menu and back to the flight screen. If you don’t have GPS it’s safe to assume you probably won’t be able to change settings while flying since you’ll have to constantly adjust the flight of the drone.
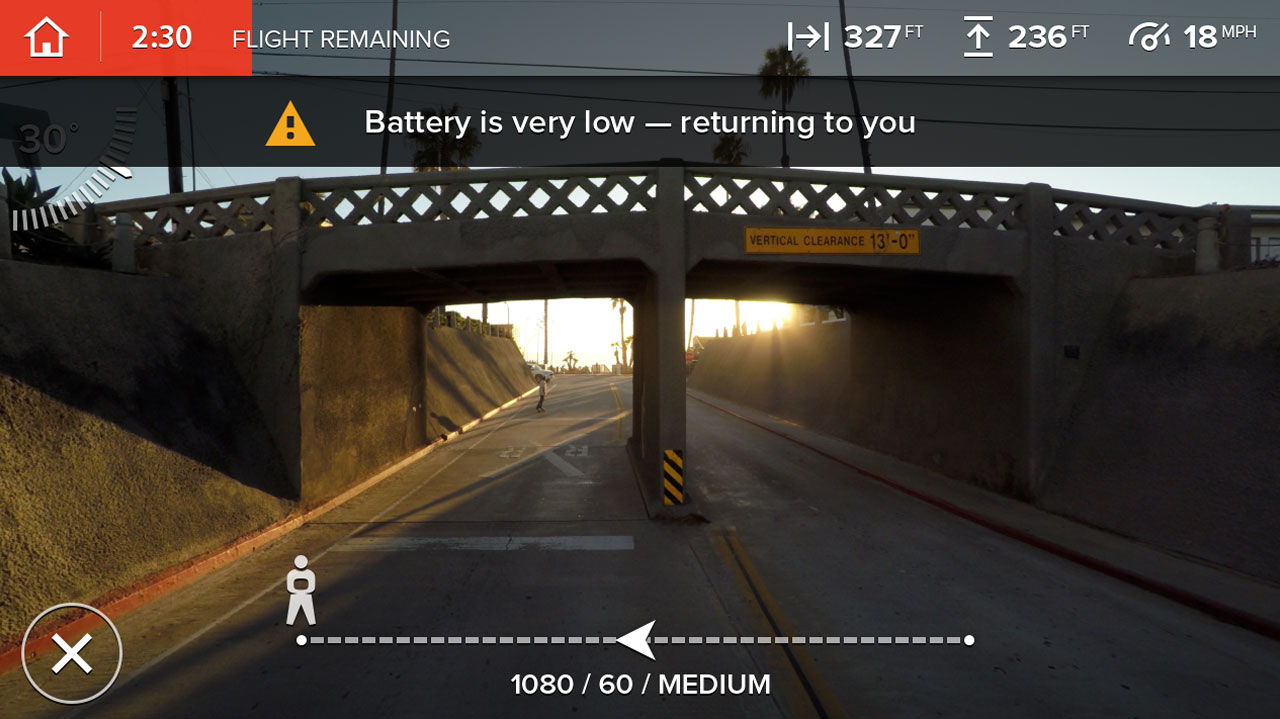
Battery Life & Low Battery
I usually get about 18 minutes of flight per battery. When it gets down to 2 minutes left on the battery, the battery meter on-screen will turn red and the drone will automatically turn around and start heading back to where you are. You’ll see an indication on-screen of what it’s doing, with the option of exiting it out of its return. If it’s super far away, I’ll let it do its thing and get kind of near me before hitting the X and manually flying it back. Most of the time, however, I have it pretty near me and I’d like to get some more juice out of the battery. I’ll hit X right away and keep flying it until the battery gets down to about 1 min. When the battery is at its complete end, Karma will simply land in place. You can still give it some gas to keep it up and bring it closer to you, but it’ll be fighting you and trying to land. Obviously it’s not a great practice to get to that point; however, it’s good to know the limits and what happens when it gets that low.
Battery life is influenced by a multitude of things – high altitudes and colder temps will give you slightly lower flight times. I haven’t tested full winter, but I have flown it at 15,000 feet in the Andes. I was getting around 12-16 minutes per battery.
I’ve found that 3 batteries is kind of my magic number for average daily flight sessions. I’ll usually end up flying 2 batteries, but it’s great to have the 3rd as a backup. The batteries themselves charge extremely fast – to 100% in 1 hour. The included charger brick has a wall outlet cable and then both a battery connector and a USB C cable breakout. This way you can simultaneously charge a battery and anything that takes USB-C (Karma Grip, Karma Controller, HERO5 Black & Session)
Ready to Fly – Extras
Auto Shot Paths
Karma uses GPS and your input to setup some pretty cool & cinematic auto shots. To access an Auto-Shot Path, click the icon of the drone in the bottom right of the controller screen while in flight. *note – Auto-Shot Paths are only available when you have a GPS signal.
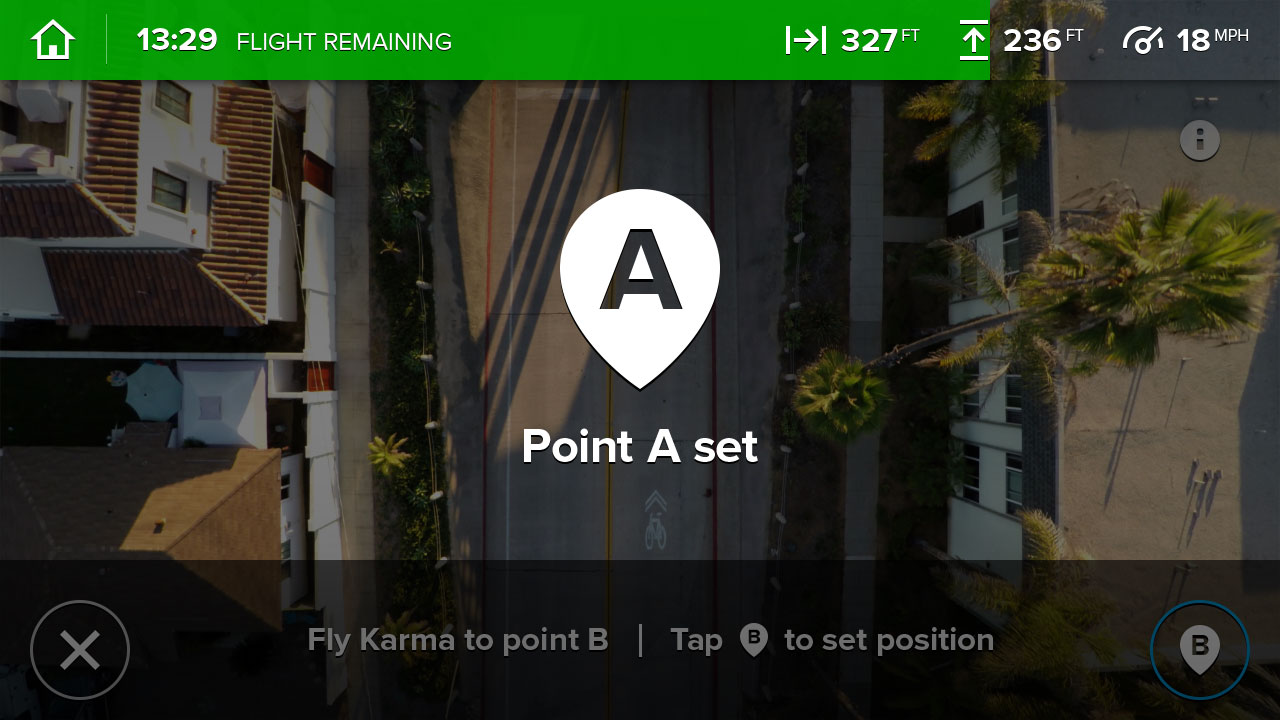
Cable Cam
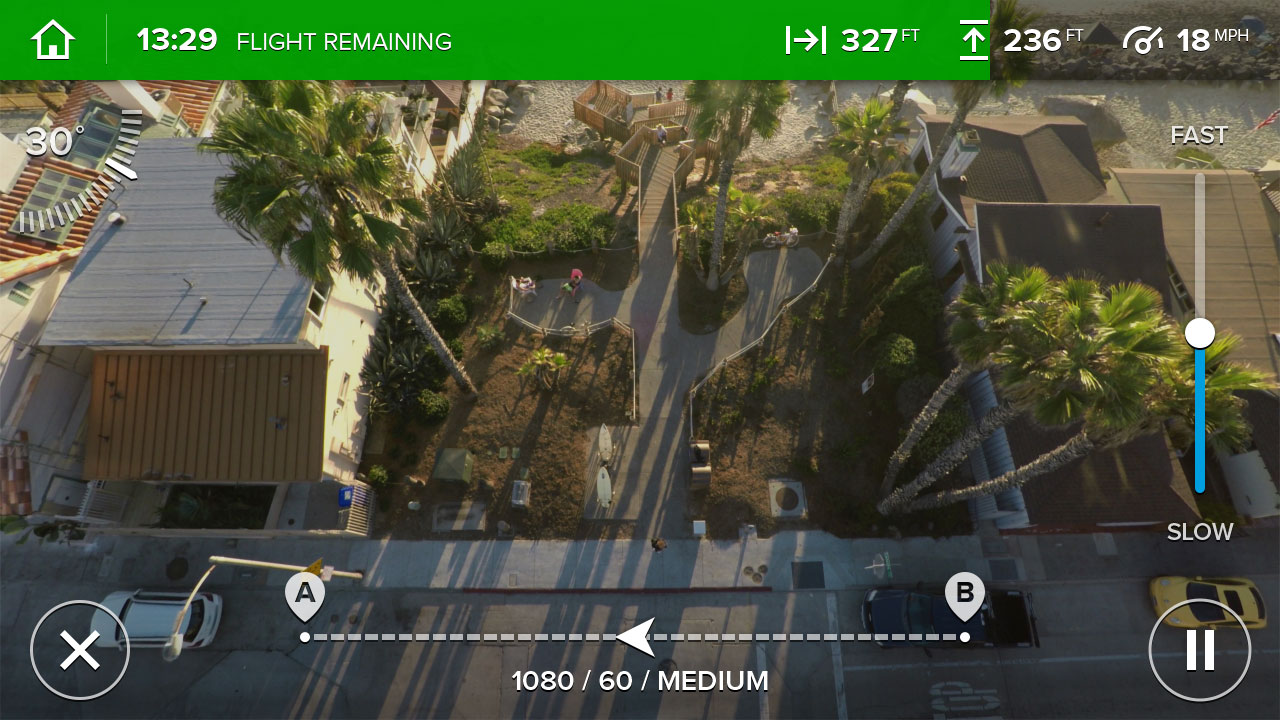
Once you click on Cable Cam inside of the Auto-Shot Paths menu, it’ll show you a little demonstration video – hit X (you’ll only see this video the first time you access it). Fly to where you want your drone to start (location & altitude), hit “A” to set the point. Next, fly to where you want it to end (location & altitude), hit “B” to set the 2nd point. Karma will fly back and forth continually between these 2 points. You can control speed on a slider on the right, and change it dynamically while it’s flying. You can also press pause at any time to stop it where it is. I like to let it get to where I want it to start, hit pause, and get ready for the shot. Once you’re set, you don’t have to worry about flying the drone at all. Keep in mind GPS will occasionally allow it to float in a couple foot radius from where the path is, so don’t make the path too close to the ground or obstacles. While it’s going back and forth on the cable cam you can control the yaw (lateral spin) on the drone, as well as the gimbal tilt. Height and and location in space are fixed. It’s a great tool because once your shot is set, the only thing you focus on is watching the screen to nail your shot.
Orbit
Orbit flies your drone in a perfect circle around a point, centered at the middle. To get it setup, fly to your center point, tap “A”, then fly to your outer point and tap “B”. It’ll start spinning around point A with a radius of the distance between A & B. While it’s running you can adjust the speed with the slider on the right. The awesome thing about orbit is you still have a lot of control over the drone. You can go up or down in elevation while it continues to circle. If you back up or push forward, the orbit will just grow larger or smaller. You can also tilt the gimbal up or down. This mode is awesome for really unique and creative shots around a subject. At any point you can always hit pause and it will freeze in place.
On the HERO5 launch shoot this is how I captured most of our firework shots. I would circle quickly around the fireworks while accelerating upwards and tilting the gimbal down more and more until I was basically spinning, looking straight down at the fireworks shooting up at me.
Reveal
This is a pretty simple move, but very cinematic. You fly to the end point, hit “A”, then fly to the beginning point and hit “B”. The gimbal will tilt downwards automatically for the start, then as Karma flies from B to A, the gimbal will gradually tilt upward until it’s looking flat at the horizon at the end. This auto-shot will finish with the one move, but it’s easy to go back and set it again since it’ll end at the end point. Check it out here (too nauseating to leave on-screen)
Dronie
Another simple move but very effective. Get karma set to where you want it to start, looking at your subject. Make sure there’s nothing in the way where it’ll fly out. Karma will fly out and up, adjusting the gimbal automatically.
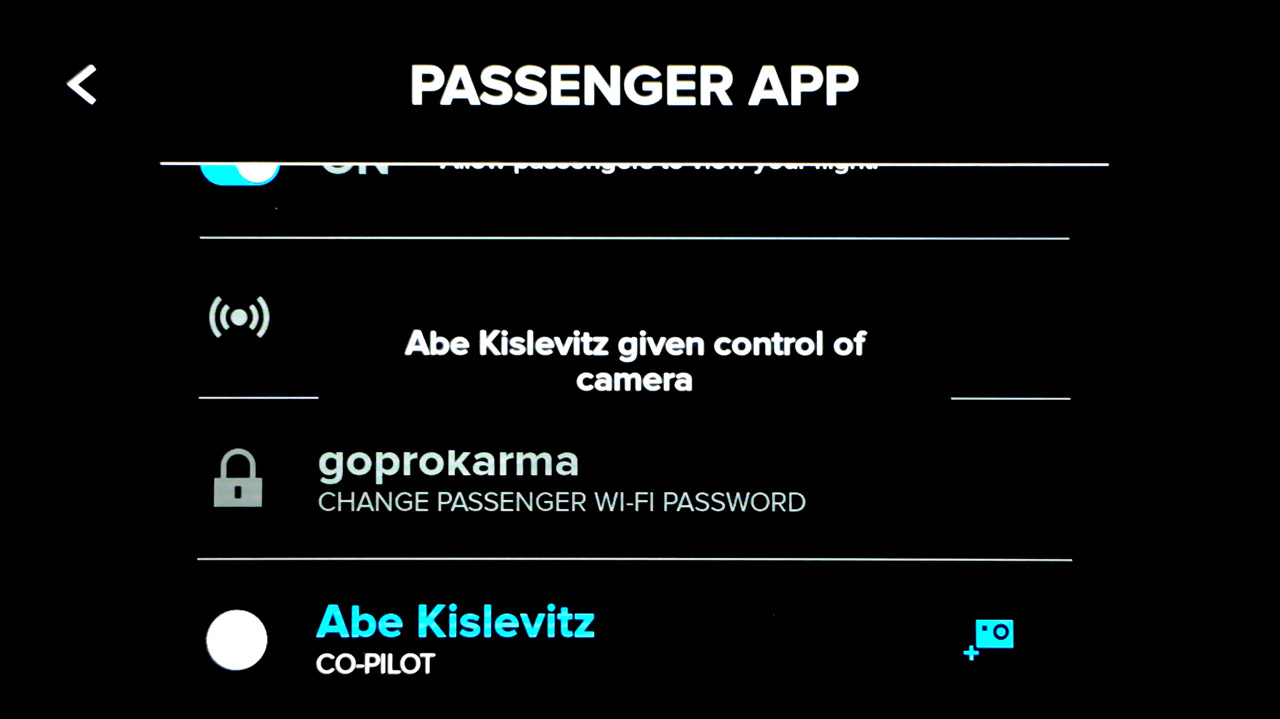
Passenger App
This allows anyone with a mobile device to tap into your flight and not only view your Karma’s live video feed, but also control the gimbal tilt, record status, and all photo/video settings. Multiple people can connect to the same flight. To initiate, press ‘Home > Connect > Passenger App’. To begin, switch on the ability for passengers to view your flight. It’ll show you what WiFi connection/password the mobile devices have to connect to. By default, anyone that connects will only be a ‘viewer’. Once a passenger is connected, the Karma pilot can enable camera control by pressing the 📷 icon next to the passenger name. This has to be enabled each time a passenger connects. While the pilot is flying, a short cut to the Passenger app list is through ‘Flight Settings > Passenger App’.

Using Karma Battery & Charger as External Battery
The Karma system was designed so it can utilize spare Karma batteries as external chargers for any of your items that take USB C (Karma Grip, Karma Controller, HERO5 Black & Session). All you have to do is bring along your wall charger (sans wall-outlet cable) and plug your Karma battery into the battery connector. The charger brick will light up indicating that it’s sending power to the USB C port. This is awesome if you end up not flying, or have spare batteries and want to charge up your camera/gimbal on the go.
Karma Backpack & Seeker Backpack
The included Karma backpack is the perfect accessory to take your Karma wherever you go. It’s a hard-case so you can feel confident nothing will get damaged. I’ve checked it on planes, thrown it around, got it wet; everything stays protected. You can keep it packed up with the props still on so there’s no assembly required when you get to your film spot. The case can carry the controller, Karma, and 3 batteries (or 2 batteries + Karma grip). Also, the Karma grip when not attached to the gimbal is all solid state so it’s easy to toss in any bag and not worry about it getting damaged. The pack comes with the same GoPro shoulder strap mounts that are on the GoPro Seeker backpack. The set includes mounting options to mount the Karma grip to the bag, or any other GoPro mount via mounting ring that attaches to the grip.
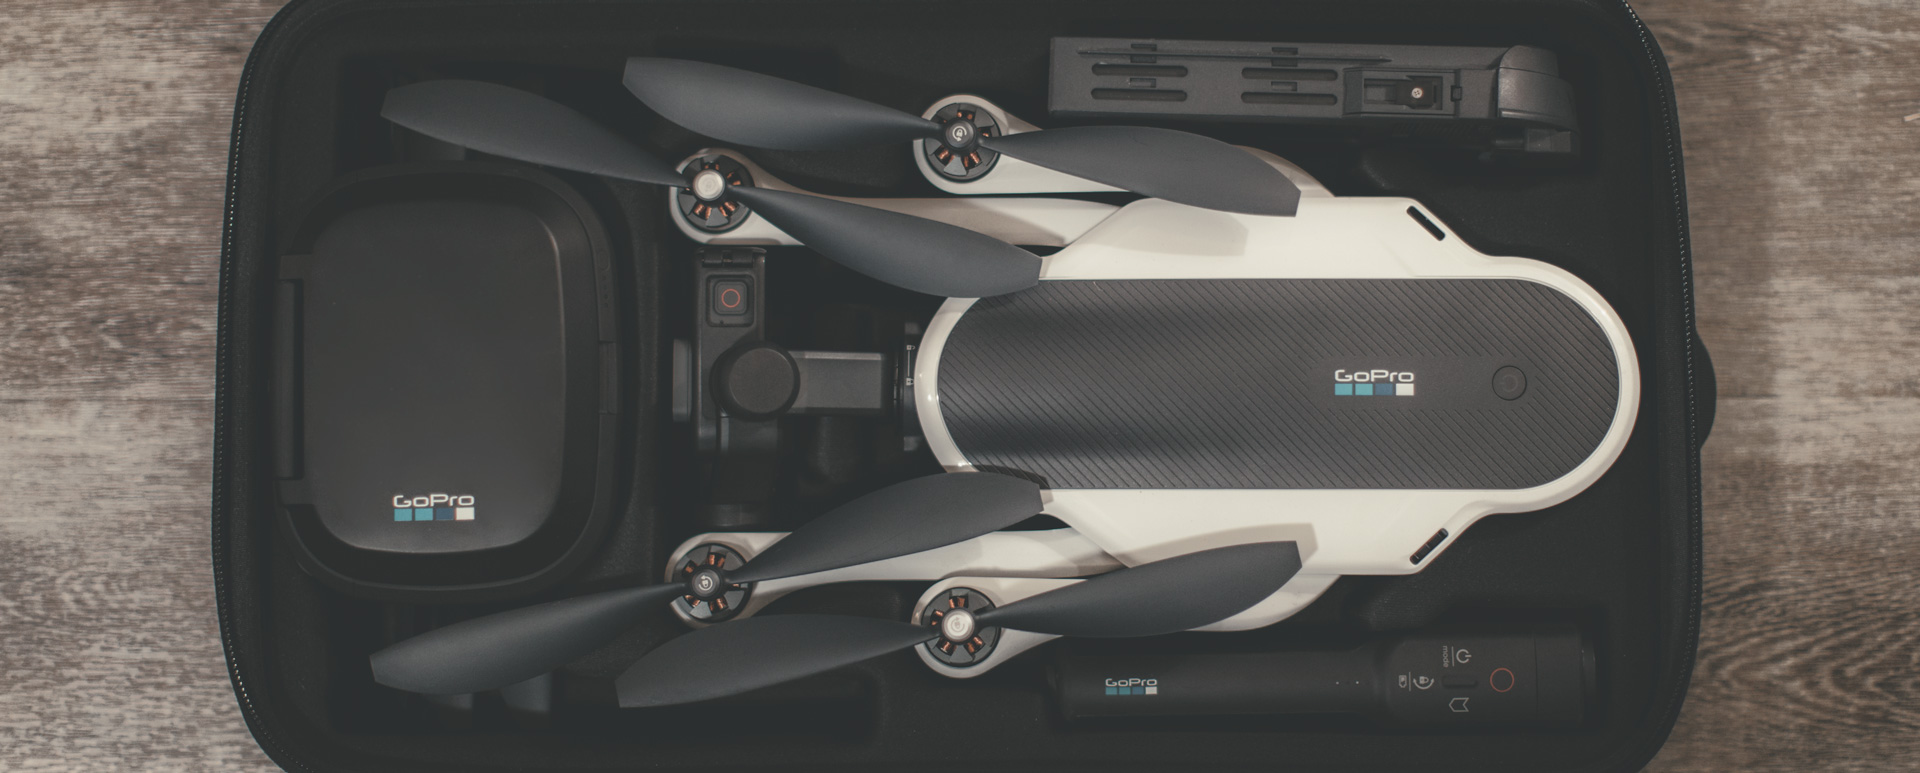
Karma also fits inside of the GoPro Seeker backpack (which it was designed for). It’s not the same hard-case protection, but it will protect it from the elements, and general use. You can fit it inside the pack with props on or off. You’ll be able to carry around more accessories if you’re using the GoPro Seeker pack.
Summary
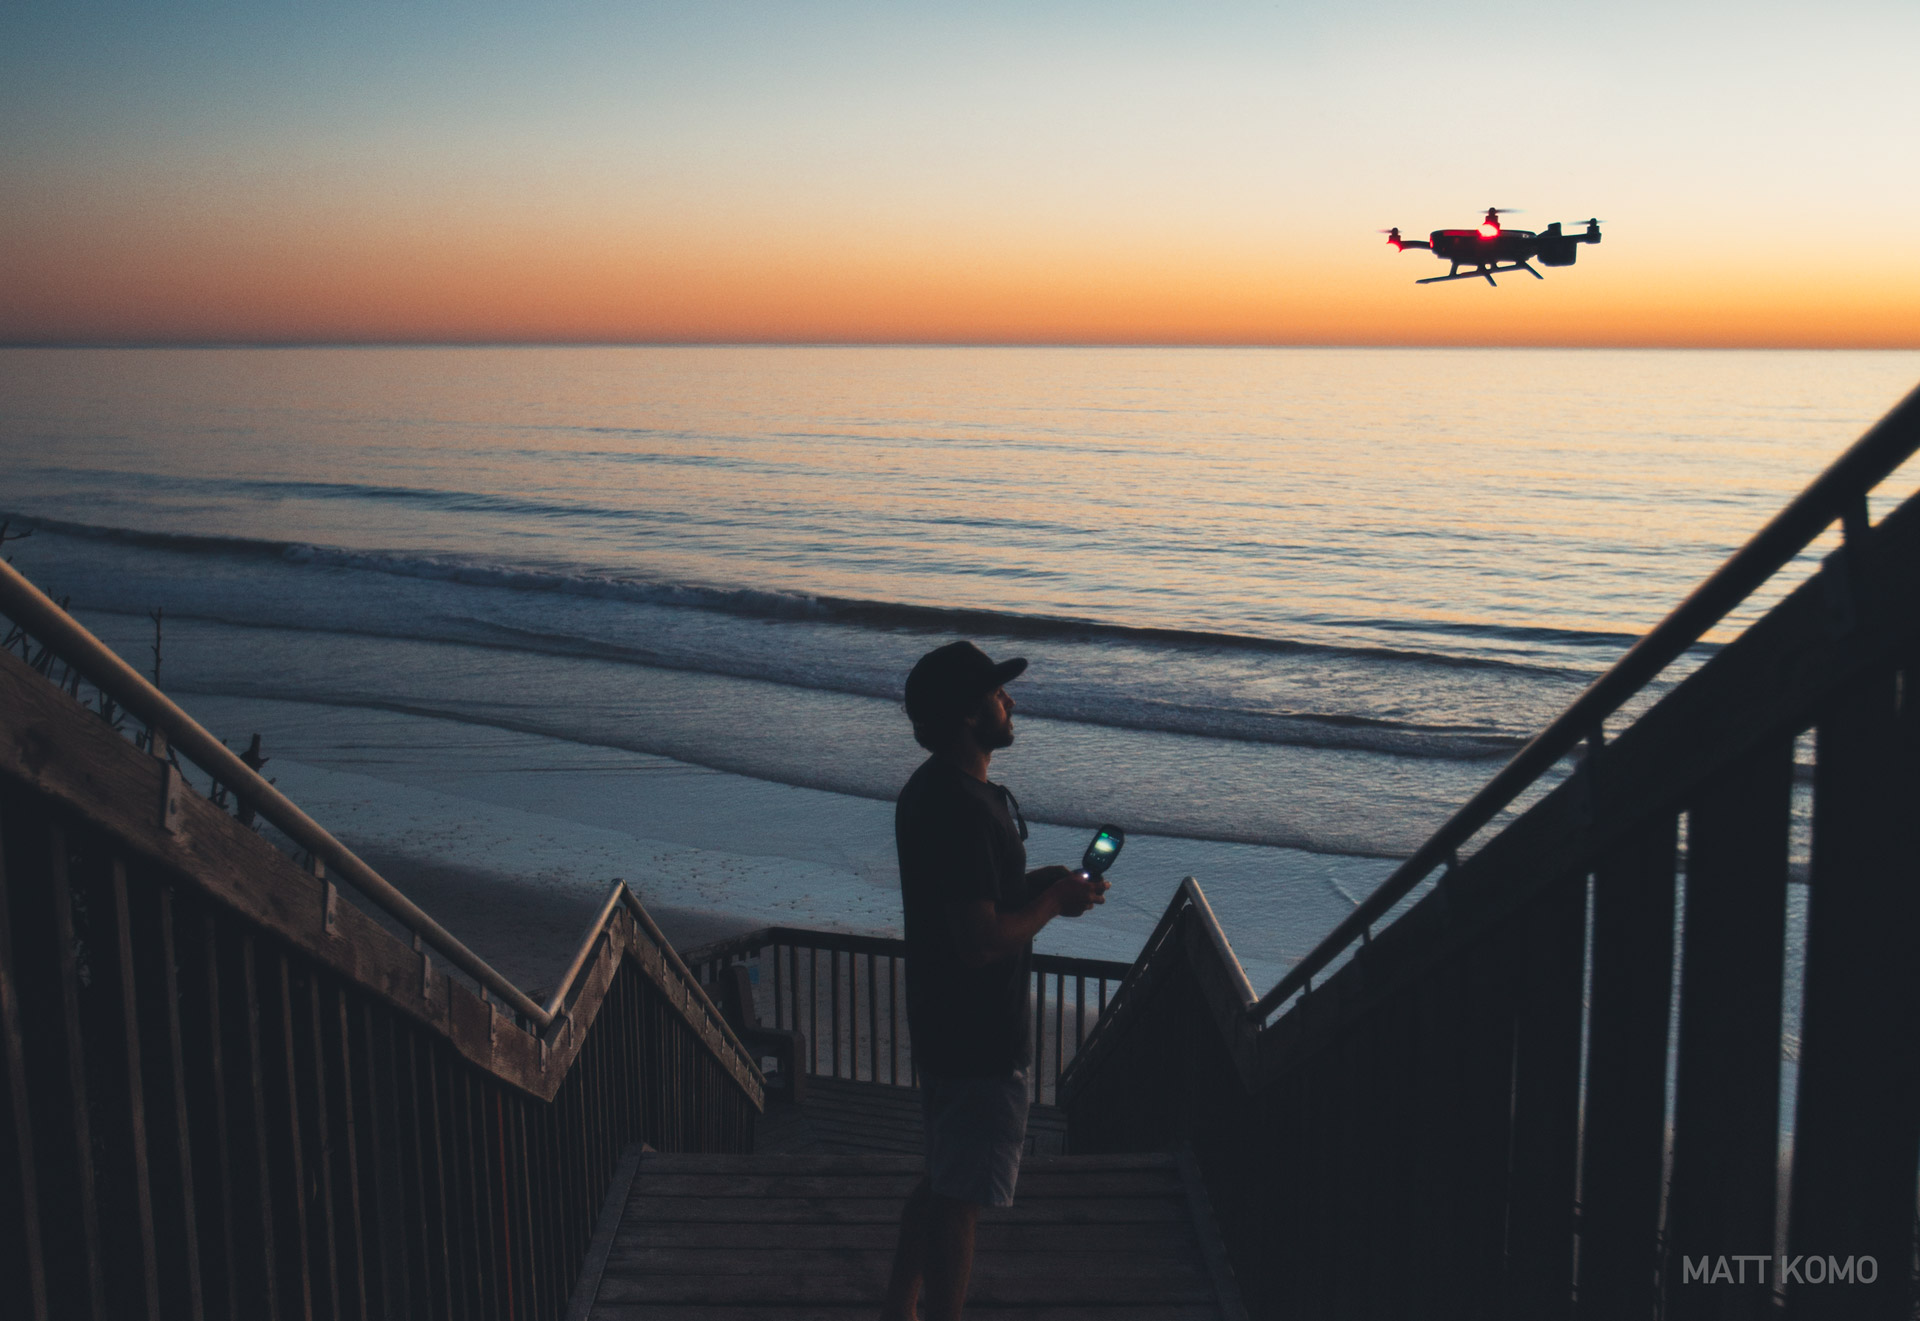
Flying with Karma over the past few months has been an absolute delight. I was on most of the launch productions all summer, and was piloting Karma for many of the shots you’ve seen in the HERO5/Karma launch video. (Mountain bike shots, lake ski shots, sunset beach firework shots, van-travel shots, etc) I’ve been very active in development/feedback throughout the process, and I’m excited to see what the future holds.
I basically have the system with me at all times – I toss the backpack in my car everyday when I head to work, and have it with me on all of my travels. It’s easy to go on hikes or skate around with the system, pop it out, get it in the air, and put the backpack back on to fly around. Besides being super fun to use, I’m incredibly happy with the quality & smoothness of the video. I’ve looked at a lot of drone footage, and I truly haven’t seen smoother fluid video. When I’m in a zone that isn’t drone friendly, the gimbal is equally incredible quality wise for cinematic handheld and mounted video. I will be posting comparisons soon, but the Karma grip is a clear winner in terms of quality and stability vs. everything on the market. The integrated battery has never been an issue for me – I’ve been able to film a whole day’s adventures on one charge easily.
If you’re a filming enthusiast, GoPro owner, or someone looking to get into video production, this system is a must-have, no-brainer purchase in my opinion. If someone told me I could buy this system for $5K 5 years ago I would be 100% down. At $799 without a camera or $1099 with a HERO5 Black, it’s something I would buy in a heartbeat. Again, this is a system that provides everything I need, end to end. I’m also confident in GoPro’s ability to update the product over the lifespan to get much more out of everything in the coming months/years.
Thanks! As always, feel free to leave questions below. Myself or someone else will help you out!